Zachary
Band Instruments
New Used, Flutes, Clarinets, Saxophones, Trumpets,
Trombones
The most frequent cause of damage to a clarinet is due to improper assembly and disassembly. This is because the keys are made of soft metal and bend very easily. If the keys are bent even slightly, the pads in the keys will no longer cover the holes with a perfectly airtight seal. If the seal is broken then the clarinet will either play poorly or not at all. Therefore, the biggest enemy of any clarinet is the hands of the player. This is because many players do not even realize that they are bending keys as they are handling their instruments. Its amazing how few people actually know how to put together and take apart a clarinet CORRECTLY. The key word here is "correctly". Any dummy can put a clarinet together but doing it correctly, so that you are not bending any keys is the whole purpose.
If you follow these steps below and do it the way I outline, you will never need a clarinet adjustment or repair. So take the time, follow the pictures and learn how to do it right. Don't let your ego get in the way of knowledge. Even if you are the first clarinetist in the NY Symphony Orchestra and have played for 32 years, you still should learn to do it right. Its never too late to do it the right way.
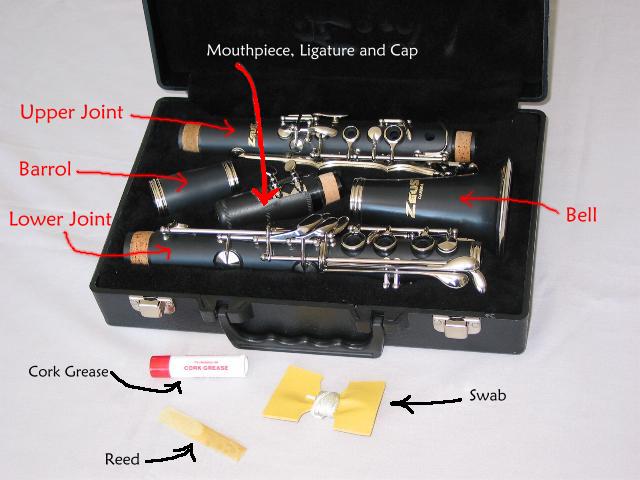
This is all you need for a clarinet. Some Cork Grease, a Pull-Through Swab, and a Reed. You do not need a cleaning kit. You should get these items you need for free any time you rent or buy an instrument.
A word about Cleaning Kits:
The only reason Care Kits exist is to enable stores to get some extra money out of your pocket every time you rent or buy an instrument. Care or Cleaning Kits have a lot of useless things in them that either you do not need or you should not use because you will damage your instrument. Be aware that care kits are a great way to add on more profit to a sale. Millions of care kits are sold each year to the inexperienced. They are also recommend by teachers lacking solid knowledge of instruments.
Assembly (for disassembly just do everything in reverse order)
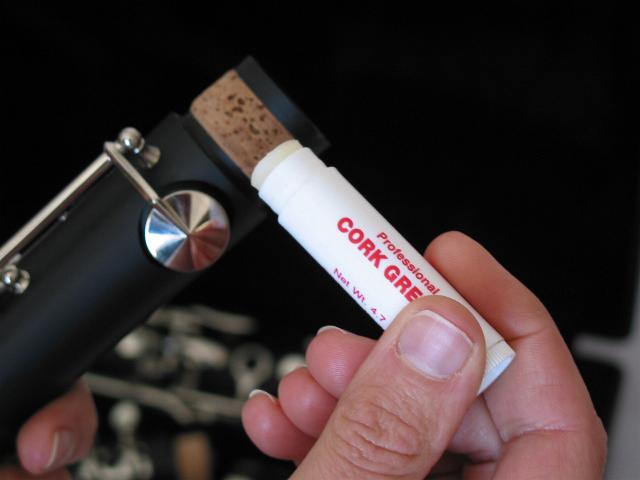
Start by putting Cork Grease on all the cork joints including your mouthpiece cork. Spread it around with your fingers so that you cover the whole cork surface with grease. You should not put grease on the corks every time you play. You only apply grease to the joints when the instrument is hard to put together. If the instrument is still hard to put together with grease then the corks need to be sanded down at a repair shop. This is not a big job. A repair tech can do it for you for just a few dollars while you wait. Clarinet joints should not not be too loose either. Remember that its much better to have a tight clarinet when its new because the corks will compress anyway as you use the instrument. If the corks are too loose when new, then your instrument may wiggle or fall apart in a few months. If your cork joints are too loose, you will need have new corks installed.
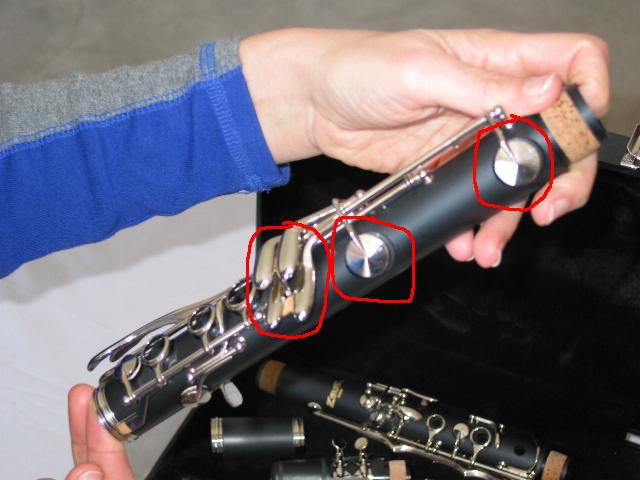
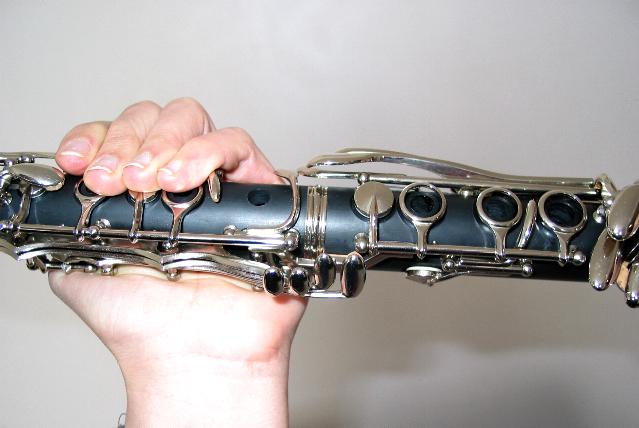
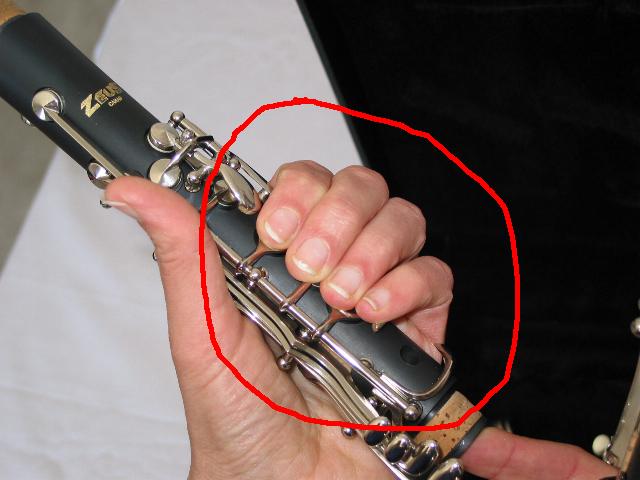
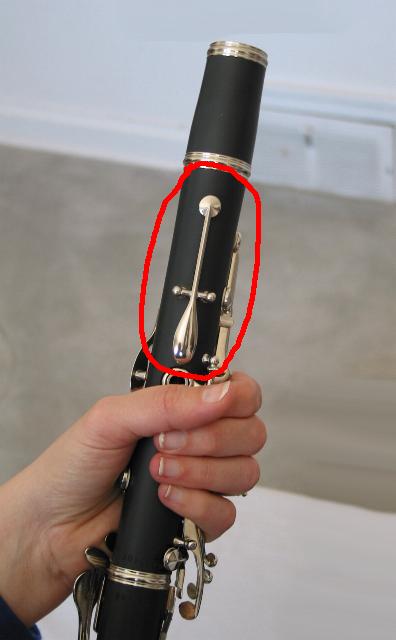
Put the palm of your hand directly over these two big keys so that the keys are pressed down by the fleshy part of your palm just below the thumb. As long as you are pressing straight down on the keys you will not hurt them regardless of how hard you press. The most important thing to remember is to have your thumb up on top of the keys and never around the bottom of the clarinet. Do not grab it as you would a baseball bat. If your thumb is on top you will not be able to bend any of the keys. If your thumb is wrapped around the clarinet, I guarantee that your hand will slip and you will bend the keys sooner or later. Incidentally, that key right below your thumb is the most frequent one to be bent on a clarinet. If you bend this key you will not be able to play the lower notes. If your thumb is on top, even if your hand slips, you will not be able to bend any keys.
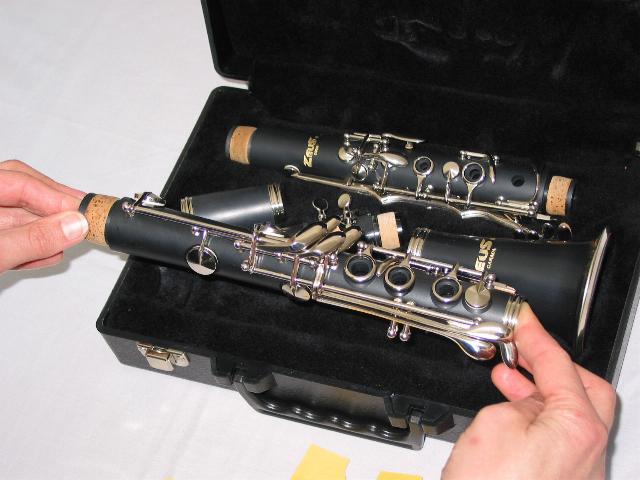
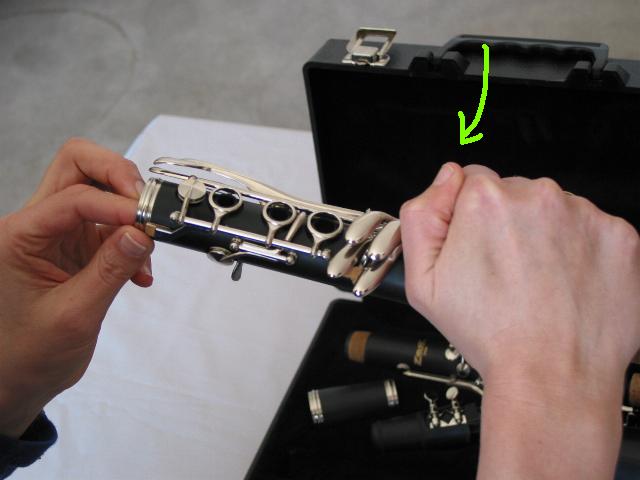
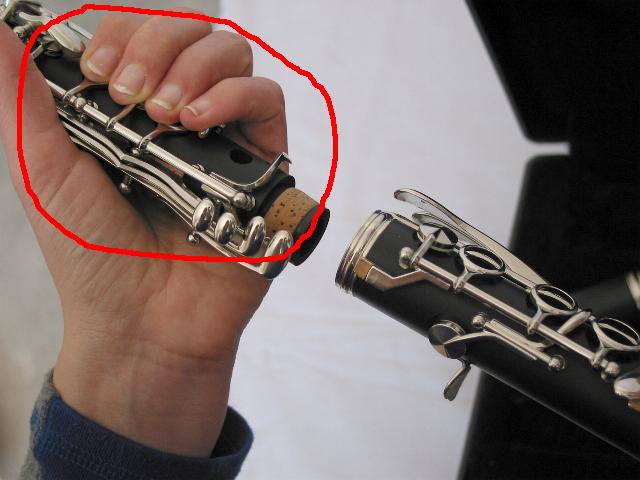
While holding the Lower Joint extend both of your index fingers and pick up the Upper Joint the same way as you picked up the Lower Joint.
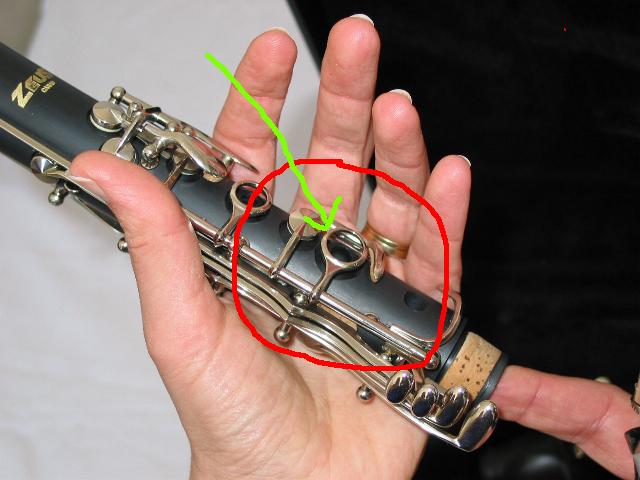
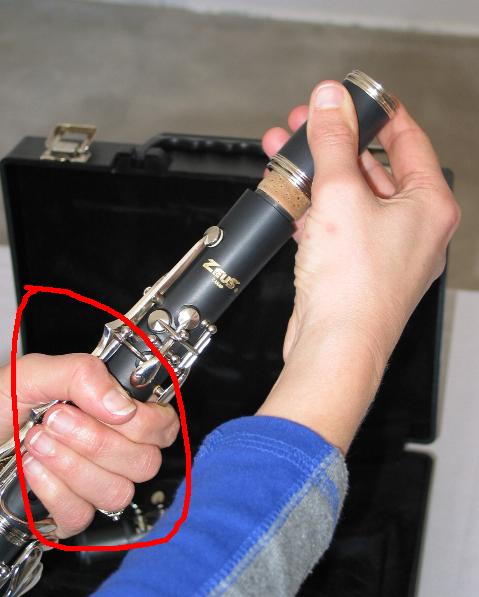
Wrap your left fingers on the Upper Joint around the Larger Ring Key. Take a close look. If you depress the large ring key on the Upper Joint, the bridge key will lift. This is because the larger ring key and the bridge key are actually the same key. This Upper Joint Ring Key must be depressed in order to raise the Bridge Key.
Here is the correct position of your left hand.
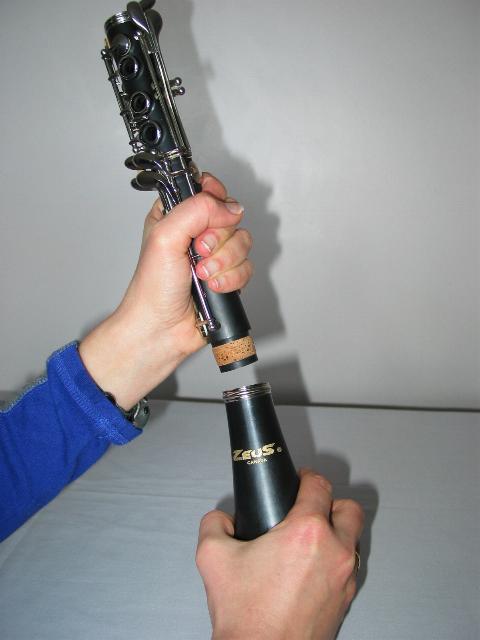
Now you have both of your hands in the correct position, so you are ready to assemble the Upper and Lower Joints. The Upper Joint ring key has been lifted, so the Lower Joint bridge key will just slide underneath it without hitting it. Now place the Upper and Lower Joints together by both pushing and twisting a bit back and forth. Your hands will move in opposite directions as you twist. Start by placing the two pieces together with the Lower Joint Bridge Key being away from you.
Always push and twist back and forth as you assemble the two joints. Do not attempt to screw them together and do not make large movements because the key clusters on both joints will run into each other and then they will get bent and misalligned.
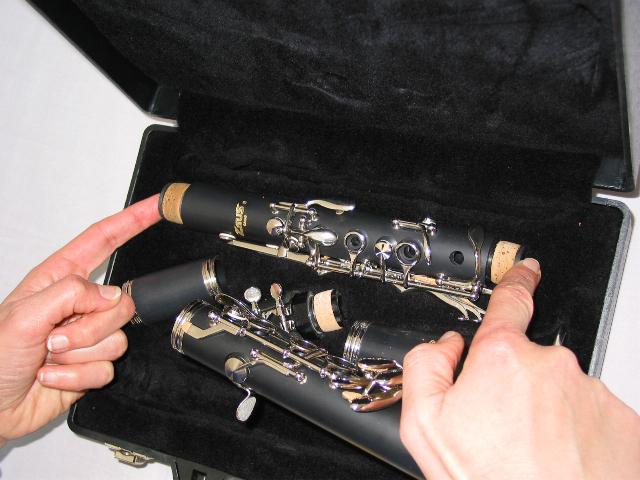
Here are the assembled Lower and Upper joints. Notice the position of both hands. If you hold the clarinet in exactly the same way, you can push really hard and you will still not bend any keys. Remember that once you place your hands in the correct position over the keys, your hands do not move over the keys. You clamp your hands over the keys and remain in that position as you assemble the pieces. Your hands, while holding the clarinet pieces, move as one unit.
This picture shows the correct position of the left hand as it is wrapped around the larger Ring Key pressing it down, therefore lifting the Bridge Key. The reason it is so important to raise the bridge key is because the other key on the Lower Joint must slide underneath the Bridge Key. Many novices and maybe even some professionals in top symphonies (just kidding, I hope not) neglect to raise the bridge key on the top joint. This results in that the Bridge Key on the Lower Joint hits the Bridge Key on the Upper Joint. In the best case you will tear off the cork and in the worst case the keys get really bent or even break if excessive force is used.
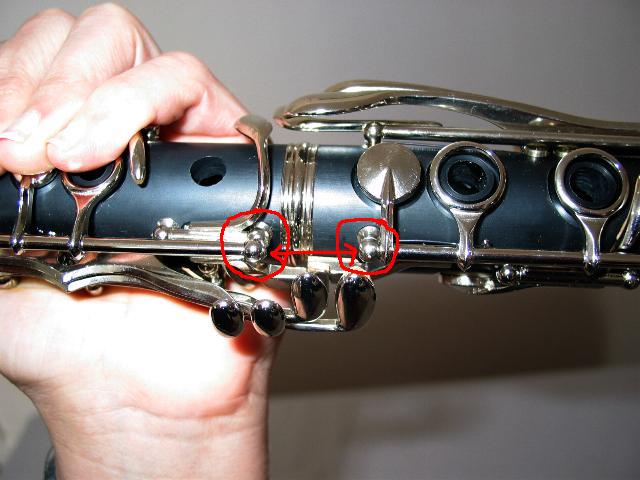
Notice that for perfect alignment the two posts that look like little balls should be aligned in a straight line. If you align these two posts the Upper and Lower Bridge keys will automatically be aligned as well.
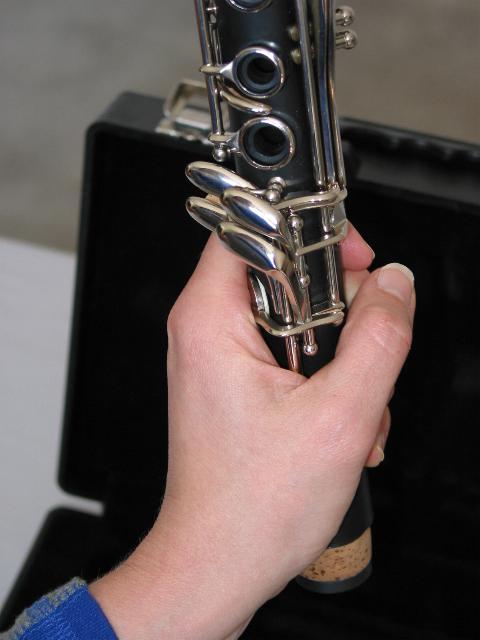
Next, you put on the Bell. You do this by holding the clarinet in your LEFT hand and you put the Bell on with your Right hand. Your thumb can wrap around the instrument because this part of the instrument (the Lower Joint) will not move. You will just hold it stationary while your right hand twists the Bell into position. Your Right Hand holding the Bell will move as you wiggle the Bell on the Lower Joint.
Here is another picture with the correct hand position when putting on the Bell.
The Bell has been assembled.
Next you put on the Barrel. First hold the instrument in your left hand in the exact same position that you had when assembling the Upper and Lower joints.
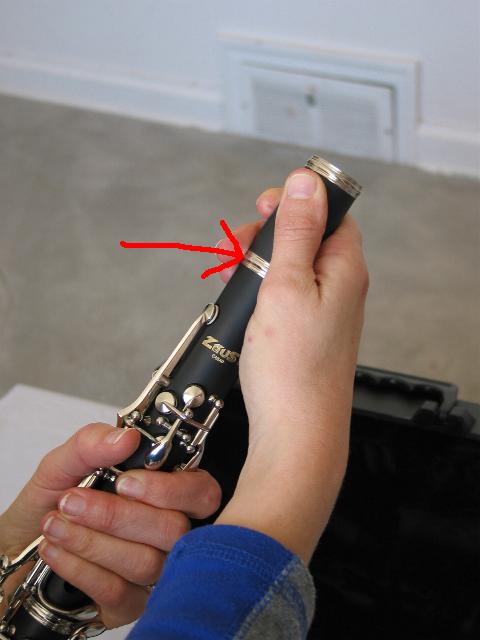
Make sure you push the Barrel all the way down. This is how you tune a clarinet by pulling the Barrel out a bit if you are too sharp. If you are a beginner, you shouldn't worry about this. You have more important things to consider like playing good, strong, clean notes, regardless of your tuning.
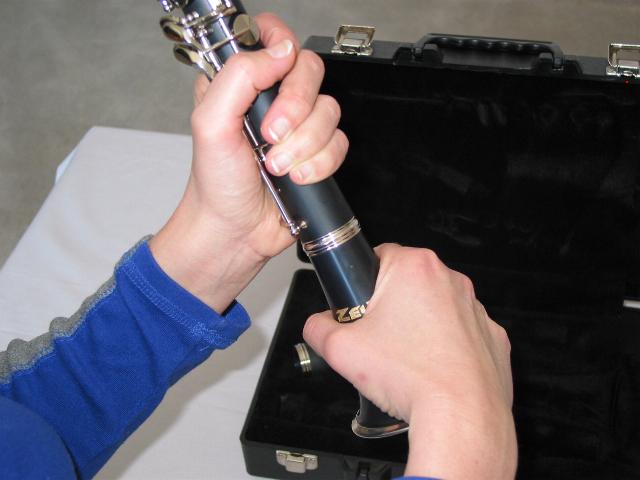
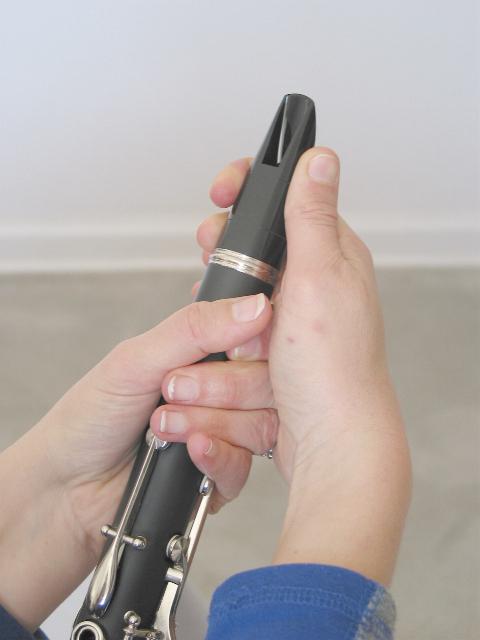
Now with the Barrel assembled you must put on the Mouthpiece. First turn the clarinet so that the Register Key faces you directly. You must do this so that the alignment of the Mouthpiece will be correct.
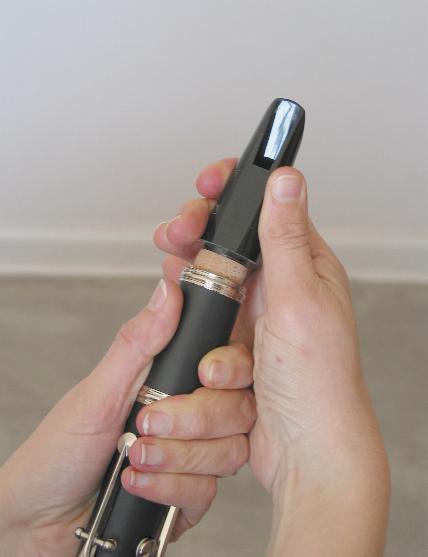
Hold the clarinet so that you are holding both the Upper Joint and the Barrel at the same time. If you do not do this, the Barrel may turn when you are trying to install the Mouthpiece. Slip on the mouthpiece the same way you did the other parts. Remember hold the clarinet in your LEFT Hand and the Mouthpiece in your RIGHT Hand. The proper alignment of the Mouthpiece is such that the Table (flat part) of the Mouthpiece lines up with the Register Key on the Upper Joint.
Here is the Mouthpiece on the instrument. Notice how the "Table" (or flat part of the mouthpiece) lines up with the Register Key. You are almost done but you are not ready to play yet. You must also install the Reed.
Putting the reed on
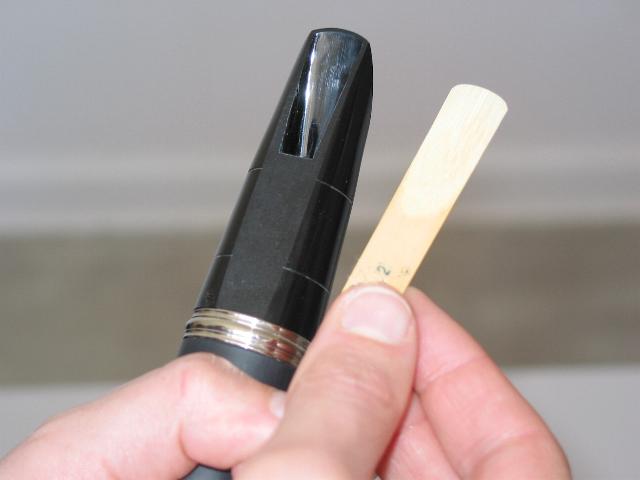
Place the Reed on the flat part of the Mouthpiece.
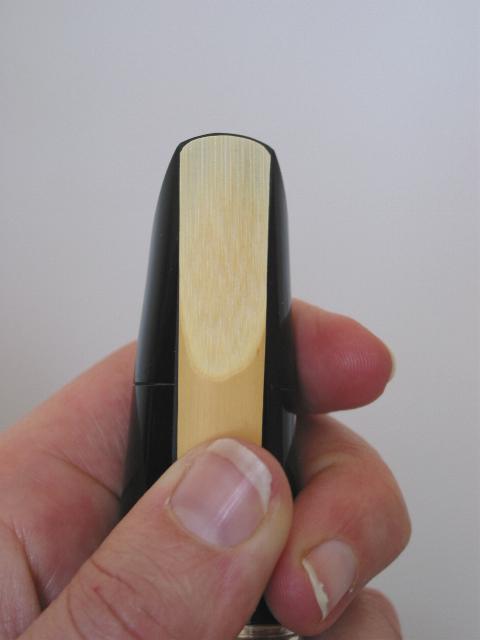
Center it and hold it in position with your thumb
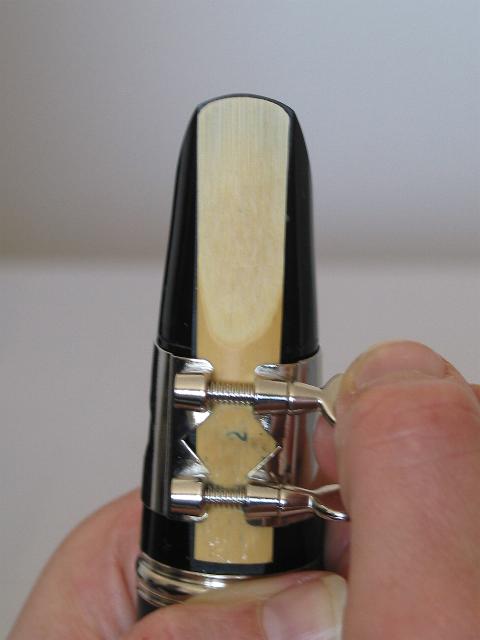
Slip on the Ligature being careful not to hit the reed because you will crack it. Next, center the Ligature over the reed making sure that the Ligature is quite low on the Reed and over the unshaved part of the Reed. Tighten the screws nice and tight and you are ready to play after you moisten the Reed in your mouth for a minute.
Cleaning
Drying your Clarinet
Did you know that you are not actually Cleaning your clarinet. What you are doing is Drying it. Clarinets do not like moisture. Pads will deteriorate sooner if they are wet and the clarinet will get moldy after a while. Especially, its not a good idea to place a wet clarinet into a closed case. It can not breath or dry out. The best way to dry a clarinet is to let it air dry. If you have a safe place to put it, then just leave the lid of the case open and let the clarinet dry overnight. Many times you do not have the opportunity to do this like when you are at school, so you must use a swab. Pull through swabs come in different styles but they do the same thing, They remove the moisture from the instrument.
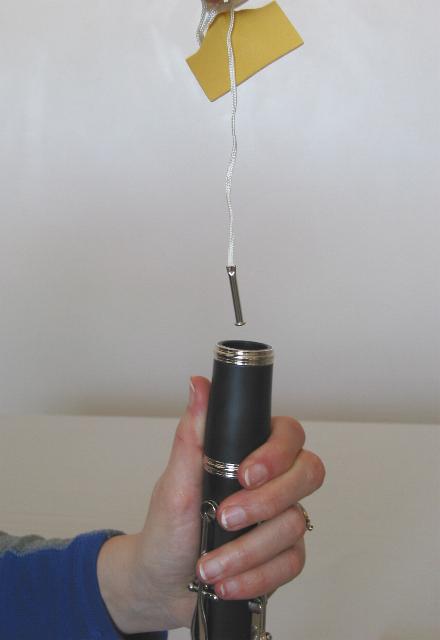
Pull-through swabs have a weight on a string that is dropped through the instrument and when it comes out the other side you simply pull the swab through the instrument several times. Simply just remove the Mouthpiece after playing. Let the weight drop through from the Barrel end to the Bell end.
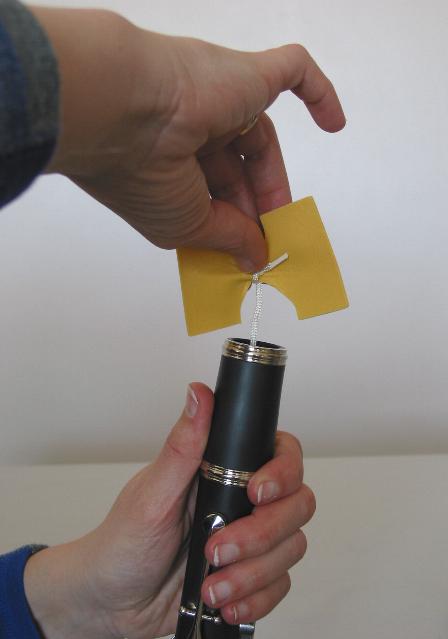
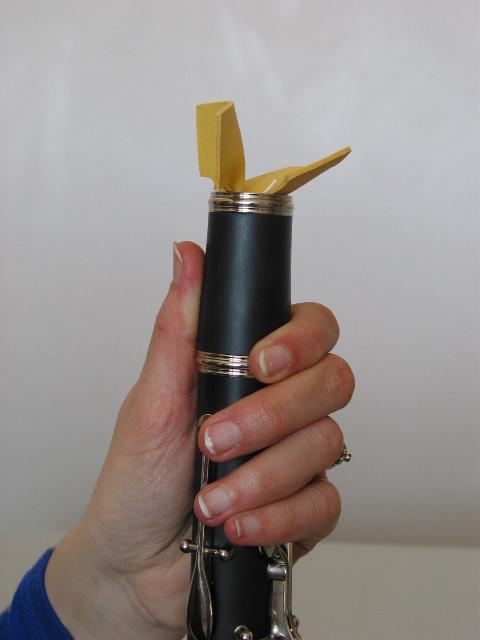
Pull gently because the Swab has to clear two metal tubes in the inside of the clarinet. If you pull too hard and too fast the Swab can get stuck and tear.
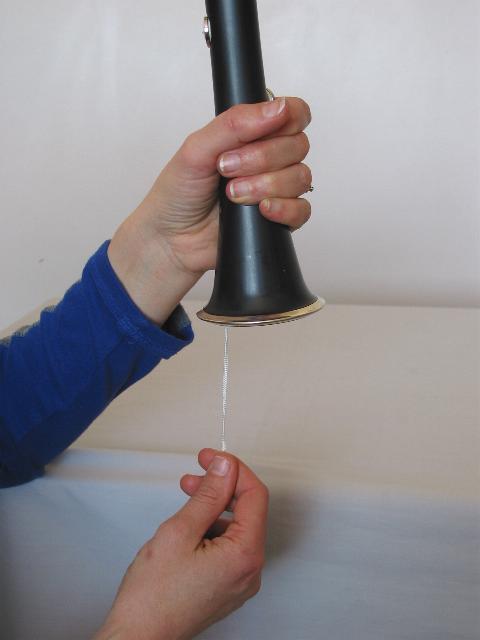
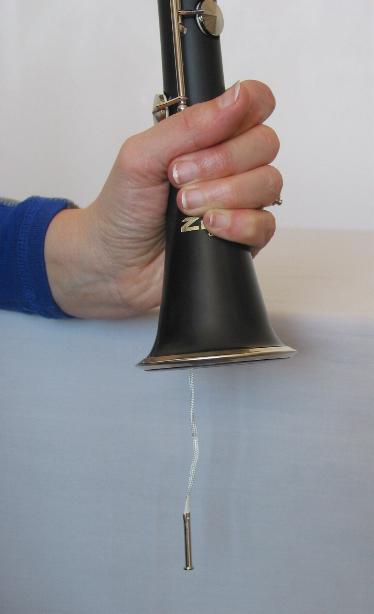
Hold on to the weight at the Bell end and pull the swab through the instrument.
Clear as mud? Good Luck