flute,
open hole, flutes, student, intermediate, professional, Yamaha, Gemeinhardt,
Pearl, Emerson, Buffet, ZeuS, Jupiter, Selmer, Artley, Armstrong, Olds, Blessing,
band instruments, marching, music, beginner,
Flute
Care and Maintenance
The flute is probably the most
fragile of all the band instruments. It is very delicate having many
keys that move up and down covering the the tone holes. These keys
are made of soft metal and can easily be bent. The most common problem
that occurs with flutes is bent keys. If a key is bent even just slightly
it will not cover or seal the hole completely and therefore the flute
will leak air. Consequently the flute will play poorly or not at all.
Please remember that the biggest enemy of any flute is the player's
hands. Anyone can make a flute unplayable in a matter of seconds and
they may not even know they are doing it. If you do not assemble and
disassemble your flute properly YOU WILL DAMAGE YOUR FLUTE.
Also please remember that bent keys are Never
Under Warranty.
Do you know how to assemble a flute???
Silly question? Anyone can assemble a flute you say.
Can you assemble and disassemble a flute CORRECTLY, so that
you don't cause any damage to the keys?
Surprisingly many players can not.
Any flute can be put out of commission in a matter of seconds if
the keys get bent and put out of alignment.
The easiest way to bend the keys of a flute is to assemble and disassemble
it the wrong way. Many players are not even aware that they are damaging
their flute. All they know is that their flute is in the shop being
adjusted all the time.
The main purpose of assembling the flute correctly is to avoid touching
the keys.
Its simple, If you don't touch the keys, you can't bend the keys.
Now then, here is the correct way. Forget the way you were taught
and any bad habits you may have developed. Do it this way and you
will never have to see a repair technician. This will save you much
aggravation and money.
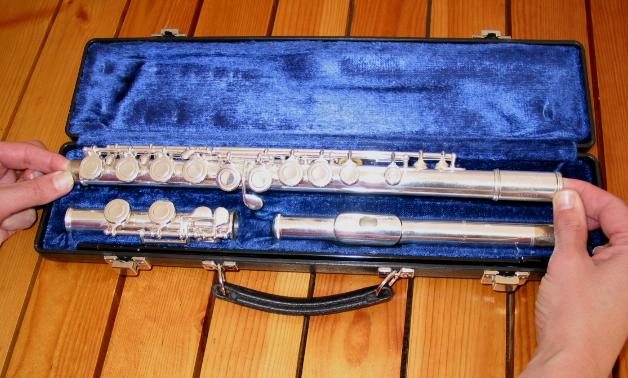
Assembly
We must first know how to identify
the 3 different parts of a flute.
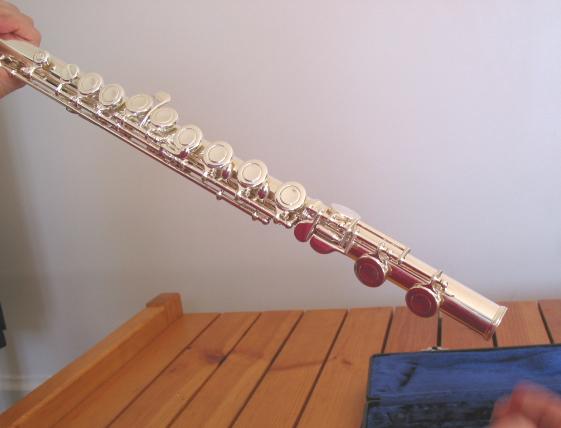
1. The piece that touches your mouth and has no keys is the HEAD JOINT.
2. The largest piece with the most keys is the BODY
3. The smallest piece is the FOOT JOINT
Before we go any further, you must know which is your RIGHT
hand and your LEFT hand. Take a moment and figure this out first.
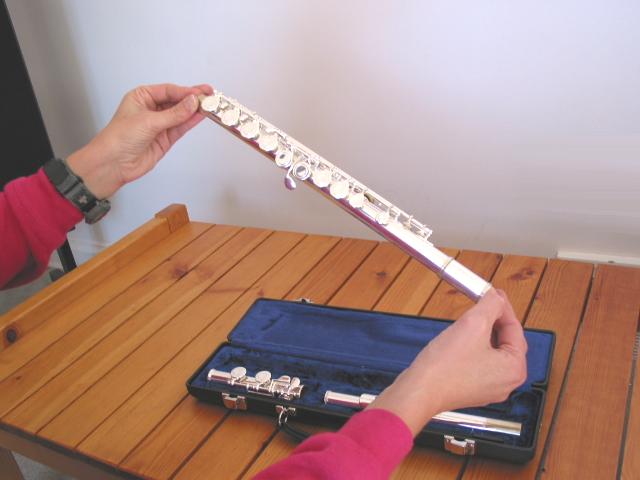
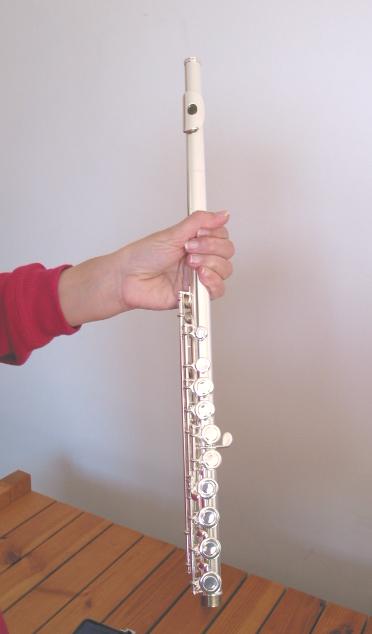
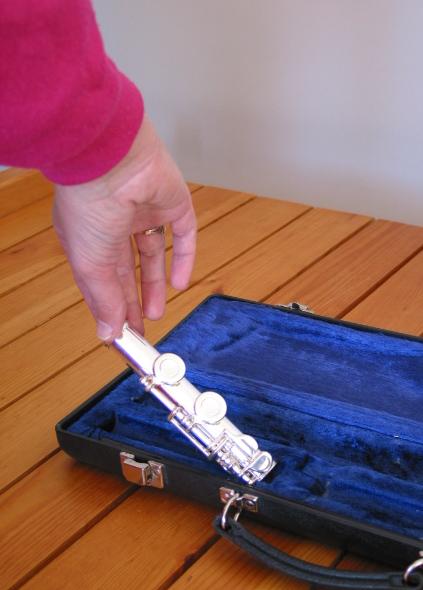
As mentioned above, the long part is the body of the flute.
Pick up the body by the edges. Always pick up the pieces by the edges, never
by the keys.
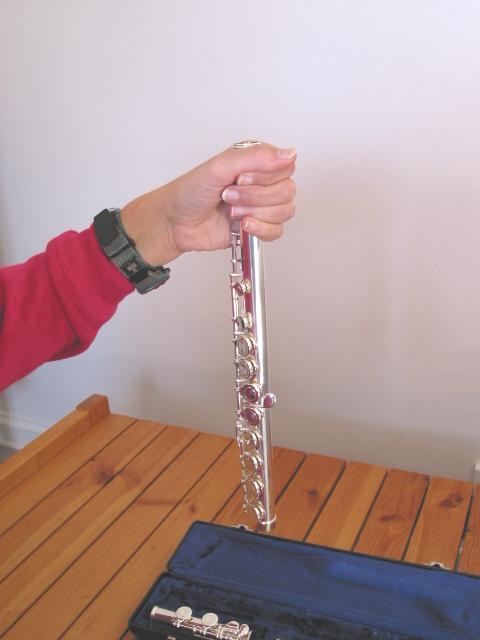

Hold the body of the flute in your LEFT hand. Put your left hand
where the writing or brand logo is.
This is a good spot to hold it because there are no keys here. You can
therefore squeeze it as hard as you want and you will not hurt the flute.
Your LEFT hand DOES NOT MOVE from this spot during the
whole assembly or disassembly procedure.
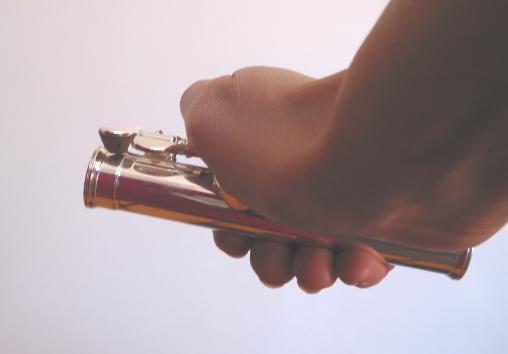
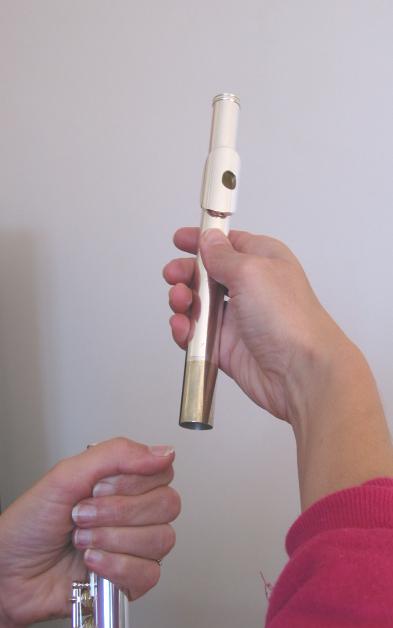
Pick up the headjoint in your RIGHT hand and place it into the
body of the flute. Do not push it in as far as it goes. Leave about a
quarter inch of the unplated part of the headjoint showing. This is where
you tune the flute. So if you push it in all the way, you will be too
sharp.
Line up the embouchure hole with the keys, so that they
are in line.
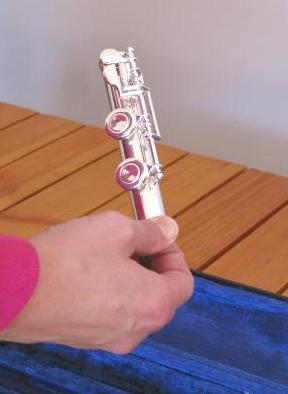
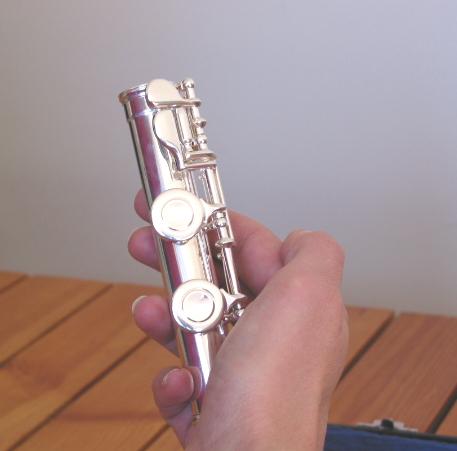
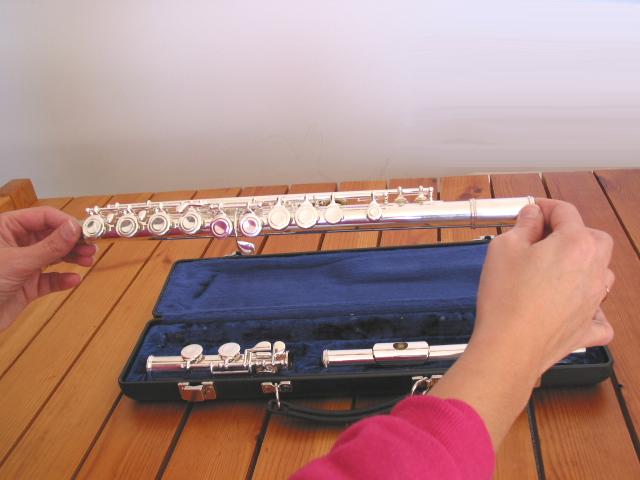
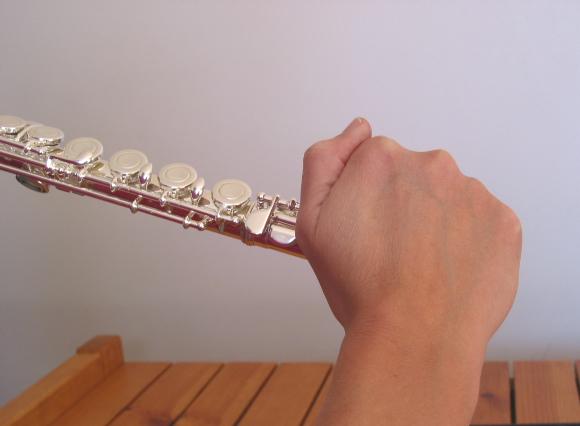
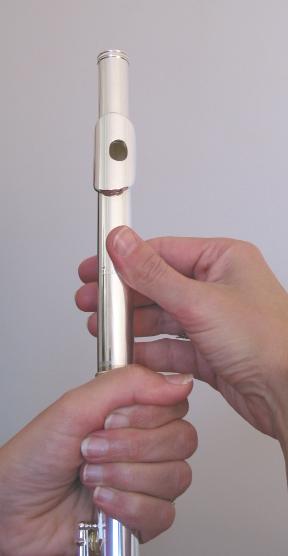
Next pick up the foot joint from the side closest to the
edge of the case in your RIGHT hand. Remember your LEFT
hand does not move from its location.
Turn the footjoint around and let gravity slide it down
in your hand until you are clamping the two large keys by the edge of your
palm. This is very critical. You must have your THUMB UP above the keys
and not around the bottom of the piece. This is so that when you assemble
the footjoint and your hand slips you do not bend the keys below your palm.
If your thumb was wrapped around the footjoint you would bend the keys when
you twist on the footjoint. If fact the C# key on the footjoint is the most
common key to get bent on a flute. Its usually bent 10 minutes after the
flute is purchased.
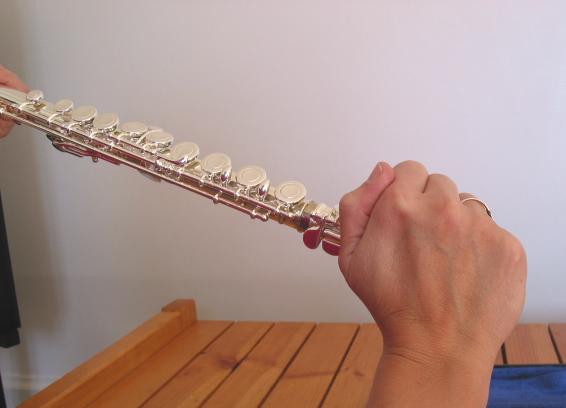
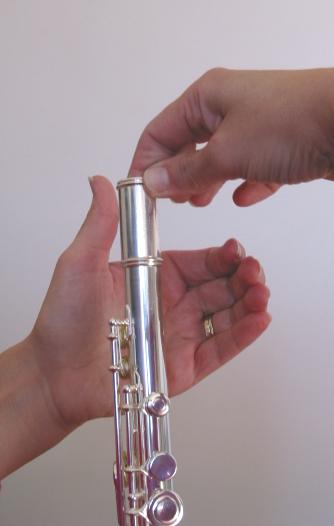
Line up the headjoint so that the post that looks like a
little round ball closest to the edge of the footjoint lines up with the center
of the closest key on the body of the flute.
You disassemble the flute exactly the same way as you have assembled
it but in reverse order. Reverse order means that whatever you did last
you do first.
Remember you hold the flute in your LEFT hand where the writing
is and your LEFT hand never moves from this spot during the whole
operation.

Hold the flute again in your left hand where the writing
of the brand-name is.
Remember your left hand does not move from this spot during the whole
operation.
Clamp the foot joint with you right hand and your
thumb on top.
Turn the foot joint around in your right hand and place
it in the case.
Now, with your right hand you remove the head joint.
Your left hand still has not moved form its original location.
Now you grab the flute with your RIGHT hand and
release your LEFT hand for the first time during the whole operation.
Your LEFT hand now holds the flute at the opposite end of the body.
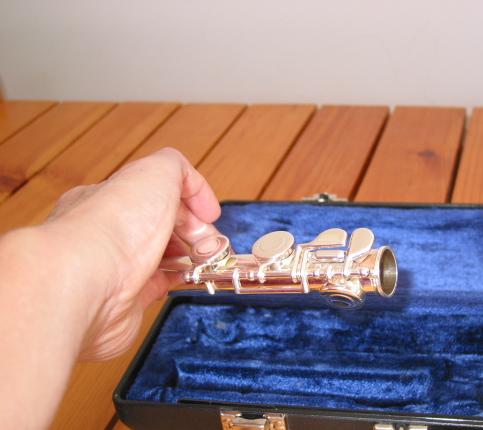
Place the body of the flute in the case. Well there you
go. You have assembled and disassembled your flute without touching any
of the keys on the body and only clamping the keys down on the footjoint.
You have not bent any keys and your flute remained in perfect alignment.
Congratulations. Now, practice this 127 times and you will be an
expert and if you do it this way every time then you will never have to
spend money on flute repairs.
Cleaning (actually
its drying)
You don't actually clean a flute, you dry it by removing
the moisture from the inside. The pads of a flute do not like moisture.
Do this drying procedure after every time you play.
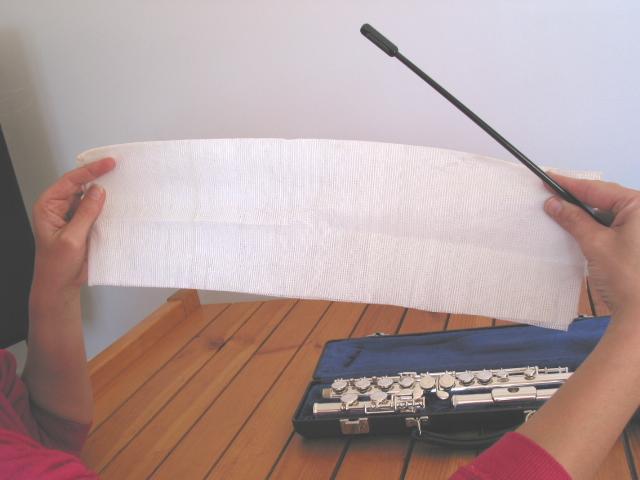
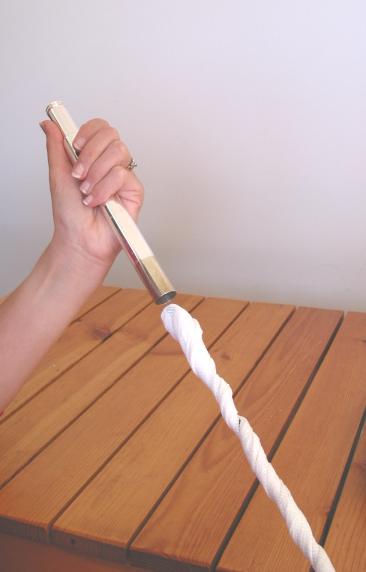
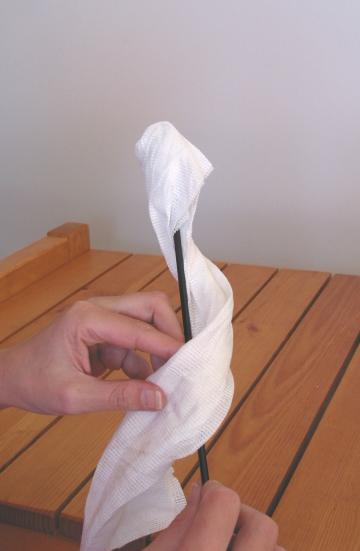
So, take a cloth, I use a J cloth that is made for the medical industry but
it can be any cloth as long as its not to big or not too small.
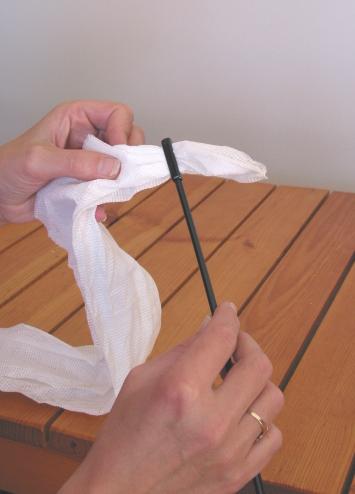
I fold the cloth in half lengthwise and thread one of the edges through the
hole in the cleaning rod.
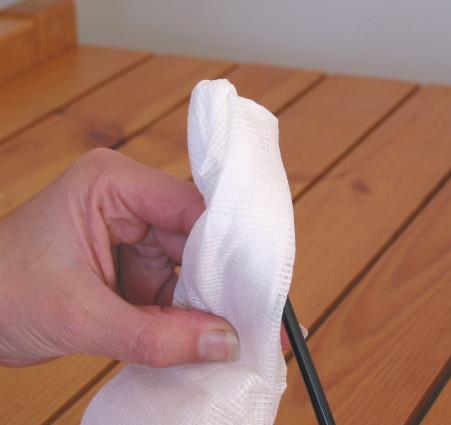
Wrap the cloth over the top of the rod so that you get the cloth all the
way in as far as the rod can reach.
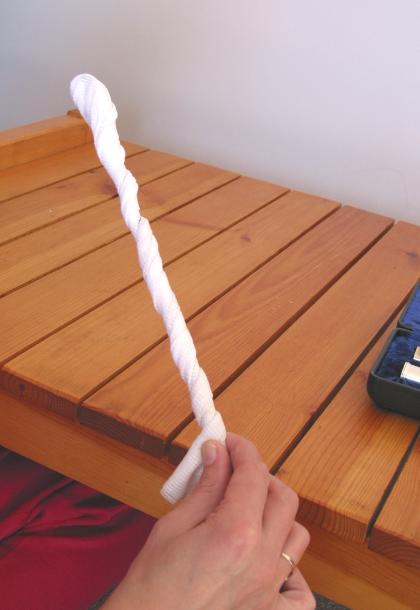
Now wrap the cloth tight all the way down the rod and hold the cloth at the
end of the rod in your RIGHT hand.
This way the cloth will never bunch up and get stuck in your instrument.
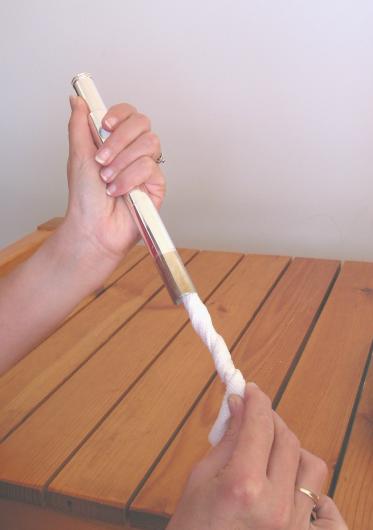
The most important part of the flute to dry is the headjoint because it gets
the most wet. Push the rod all the way in, twisting it as you move it in and
out.
If you play for a longer period then also dry the body of the flute by first
inserting the cleaning rod from one side and then the other side.
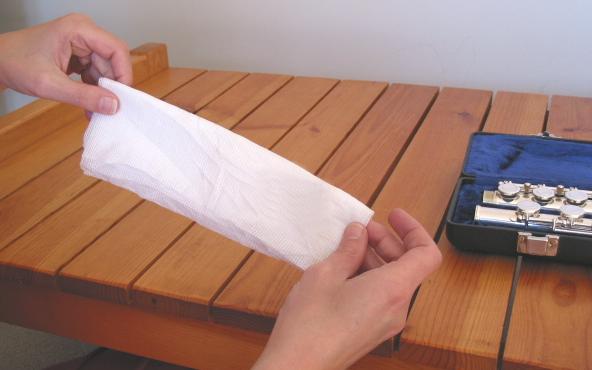
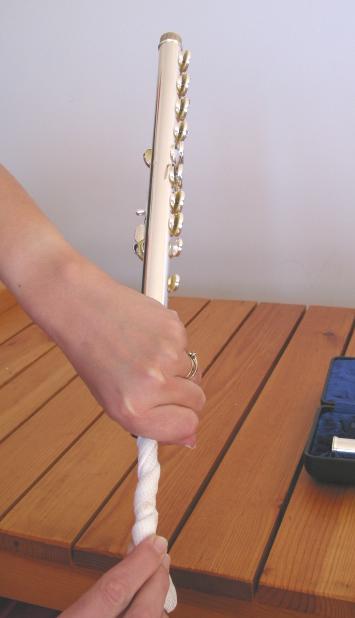
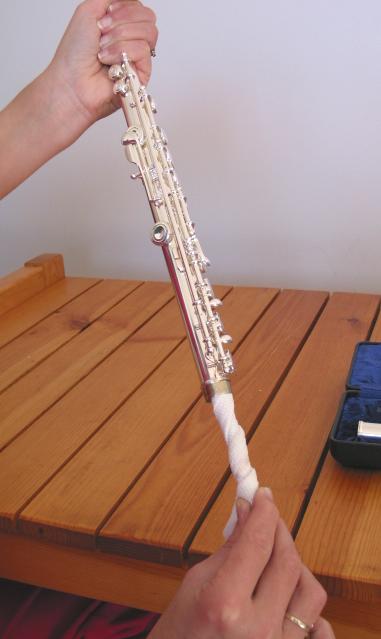
Unravel the cloth, fold it in half and then in half again. Very neatly.
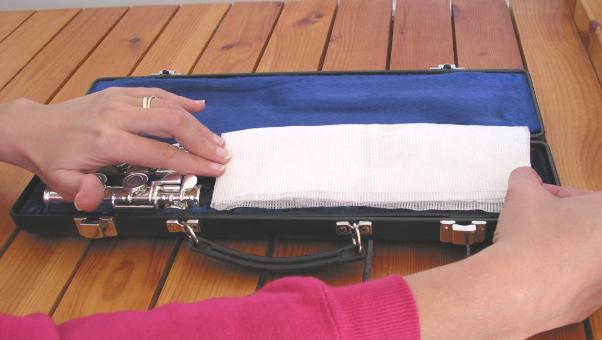
Now place it in the case on the headjoint side because there will be less
keys on that side. You don't want to squish any keys.
Now you are all done. Time to watch TV.
IMPORTANT
Don't buy anything called a "cleaning
kit" for your flute. All you need is a rod and a cloth. The
rod should always come free with your flute and you can find an appropriate
cloth. You should never do any other maintenance to your flute. I don't
even recommend that you polish your flute. Never use any silver polish.
It is abrasive like sandpaper and will either remove the silver plating
on your flute or it will get into your keywork and grind away. Ouch!
You can use a silver polishing cloth, but why, as soon as you touch
the flute, your fingerprints will be on it again. Remember it is normal
for a silver or a silver plated flute to tarnish. You can have it de-tarnished
by a repair technician when the pads are replaced every 5 to 10 years.
You do not have to take your flute in
for regular check ups. This is just a way some repair technicians pretend
that they are doctors and ask you to come back for a visit regularly.
They want to be as rich as doctors by having you return for no reason.
Remember if your flute is not broken, it can not be fixed. First determine
if your flute is indeed broken by getting a second and third opinion.
You can be sure that anything you take to a repair technician will be
considered broken. Even if your keys are bent and out of alignment it
shouldn't cost more than dinner for 4 at McDonalds.
Just make sure you take care of your flute by assembling and disassembling
it properly and never dropping it, banging it against furniture, hitting
your brother or sister with it or sitting on it.