Every so often I visit the factory where some of the best ZeuS instruments are made. I always take my camera along and take many pics of this amazing place. If you did not know where brass instruments come from, then here is your chance to see just how much work is involved in making them.
On this page you can see the many steps involved in the building of a ZeuS Trumpet, Cornet, Fluegelhorn and Trombone. Even though I have toured several other brass instrument factories in the past, such as Yamaha and Bach, I always find the process of instrument making very interesting.
Compared to the other factories I visited, I was impressed by just how much hand craftsmanship goes into the making of ZeuS instruments. The Secret ZeuS Factory is a smaller place which still makes instruments the old fashioned way. Quality is obviously something that can be much better controlled by the skill of the craftsman instead of programmed automation with limited human contact. Instead of using "hand craftsmanship" only as a buzzword to make mass-produced instruments sound impressive, this is truly a traditional shop where every ZeuS Guarnerius and Olympus instrument is hand made.
I am very happy to be able to offer my customers hand made professional trumpets, cornets, flugelhorns and trombones with the best quality, performance and specifications and also make them affordable. Besides being a world-class instrument, ZeuS is also an unbeatable value. You will agree that the quality and value is unheard of at our prices and as you will see the tremendous amount of work and skill which goes into making them.
When you play a ZeuS, you are playing one of the best there is.
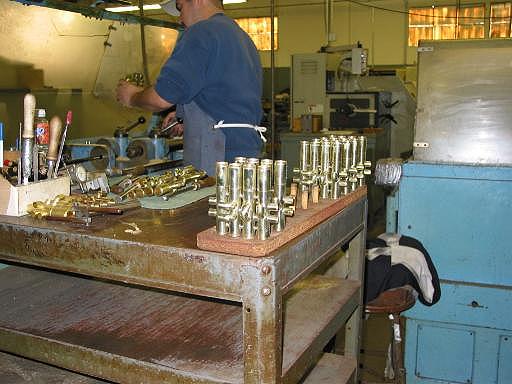
The Valve Section
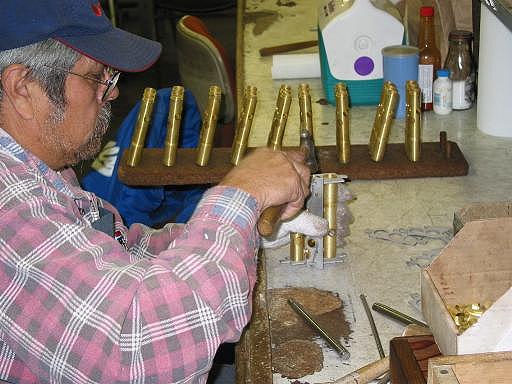
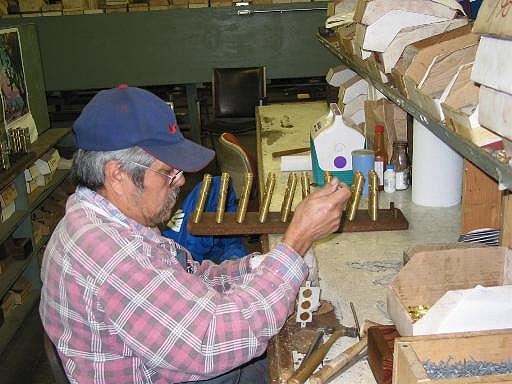
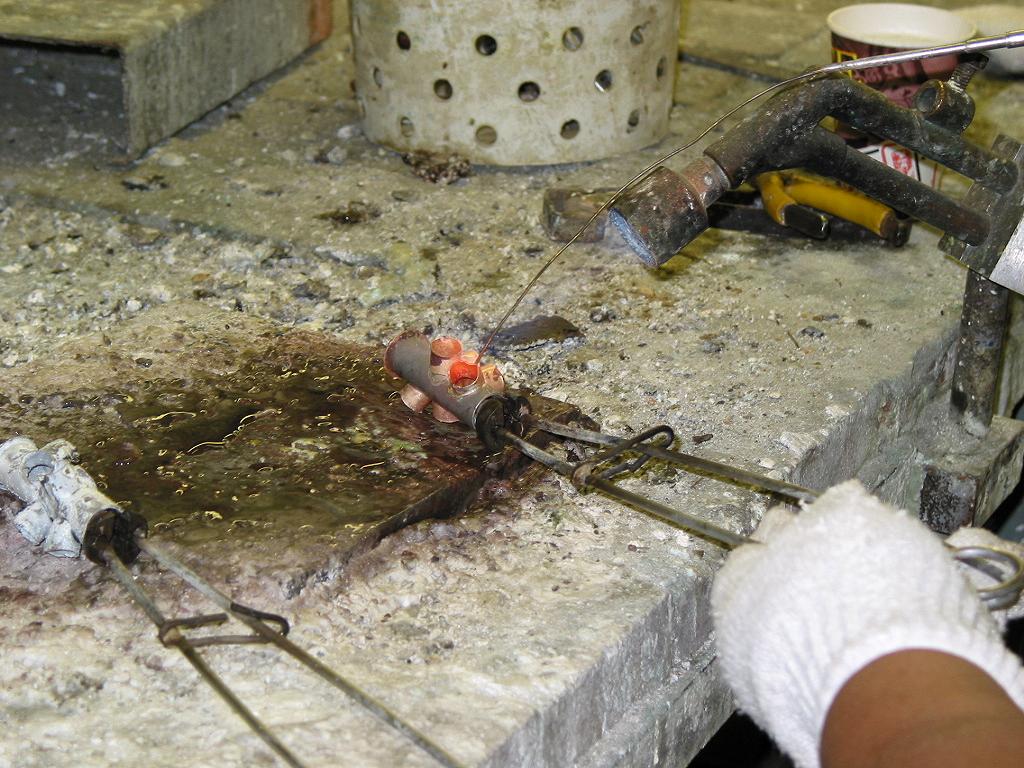
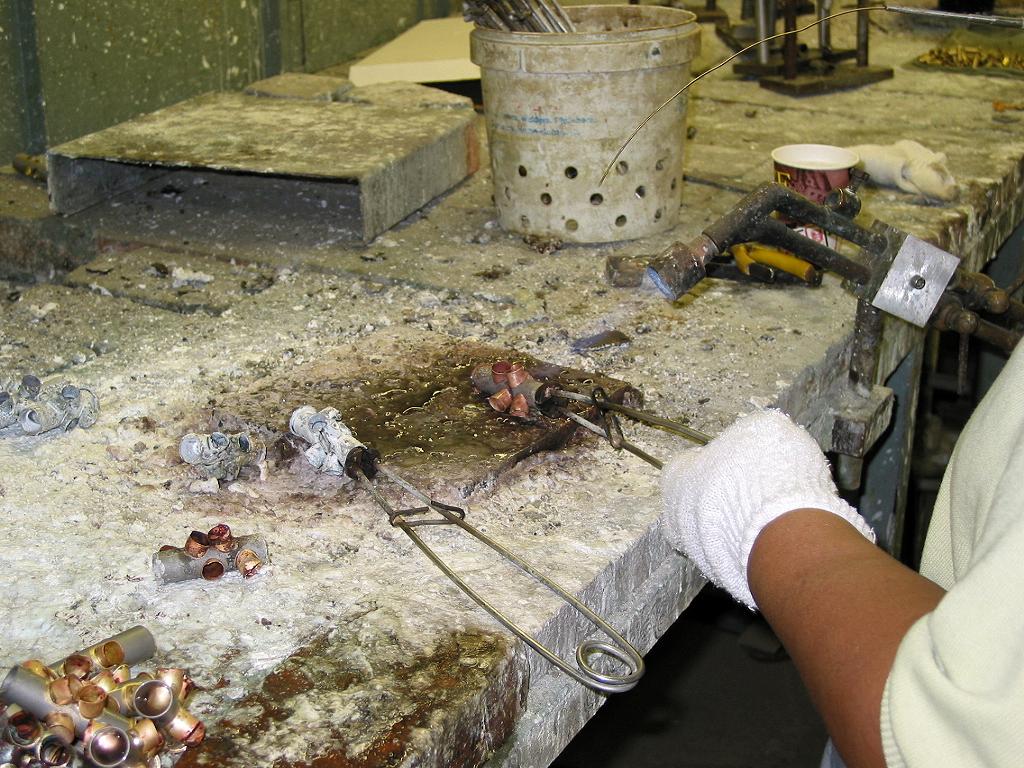
Placing the individual valve casings in a soldering jig to be soldered. You can imagine that everything must be perfectly aligned before it is soldered. The jig helps with this alignment.
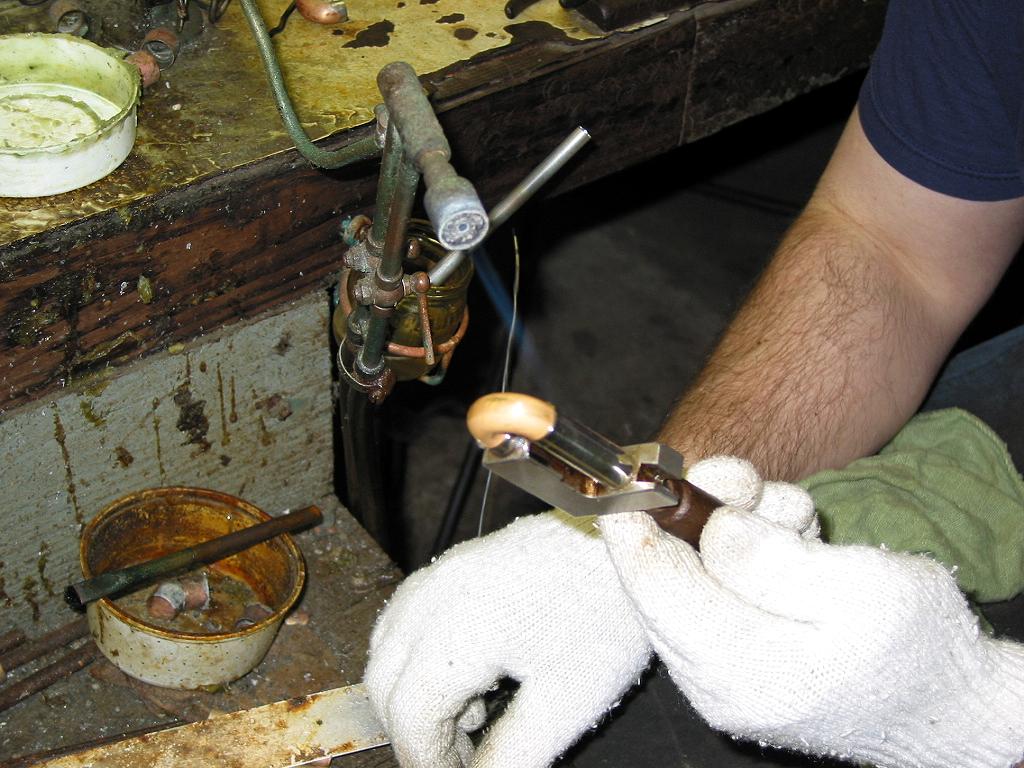
Since it was a Sunday at the time of my tour, this is only a demonstration of the actual process of soldering the three valve casings together. The valve casings are placed in a jig for perfect alignment to be soldered together using high temperature silver solder. The person is holding the silver solder in his hand. The pipe below it is a torch which is is not lit at this time. Normally there is a large and very hot flame coming from the torch that must heat up the valve casing until it is glowing red hot. This is the only time the silver solder will flow and solder together the individual pieces.

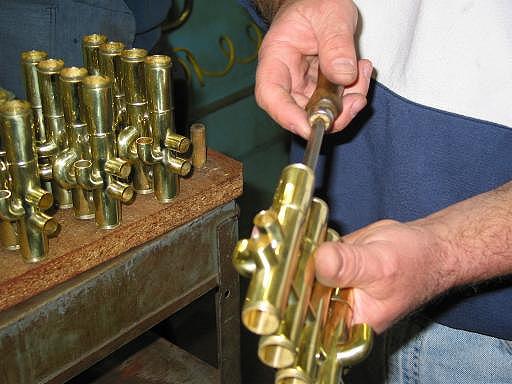
Valve sections after they have been soldered together.
After the valve casings are soldered together they must be de-burred so that the insides of the casings are perfectly smooth with no protruding pieces of metal.
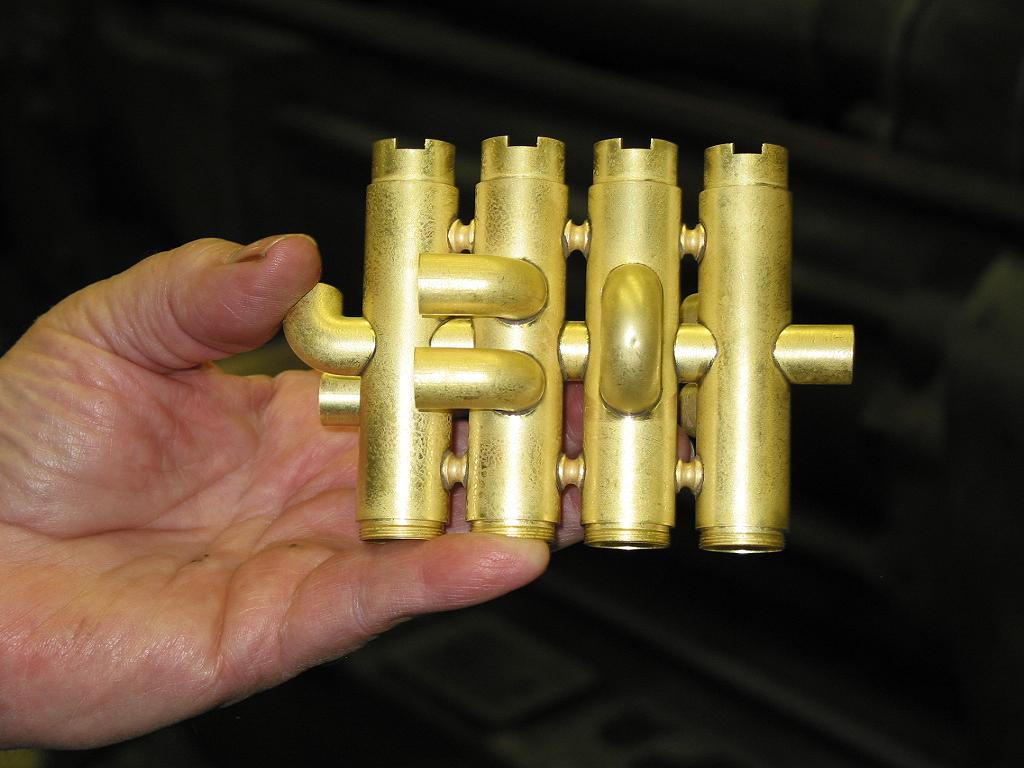
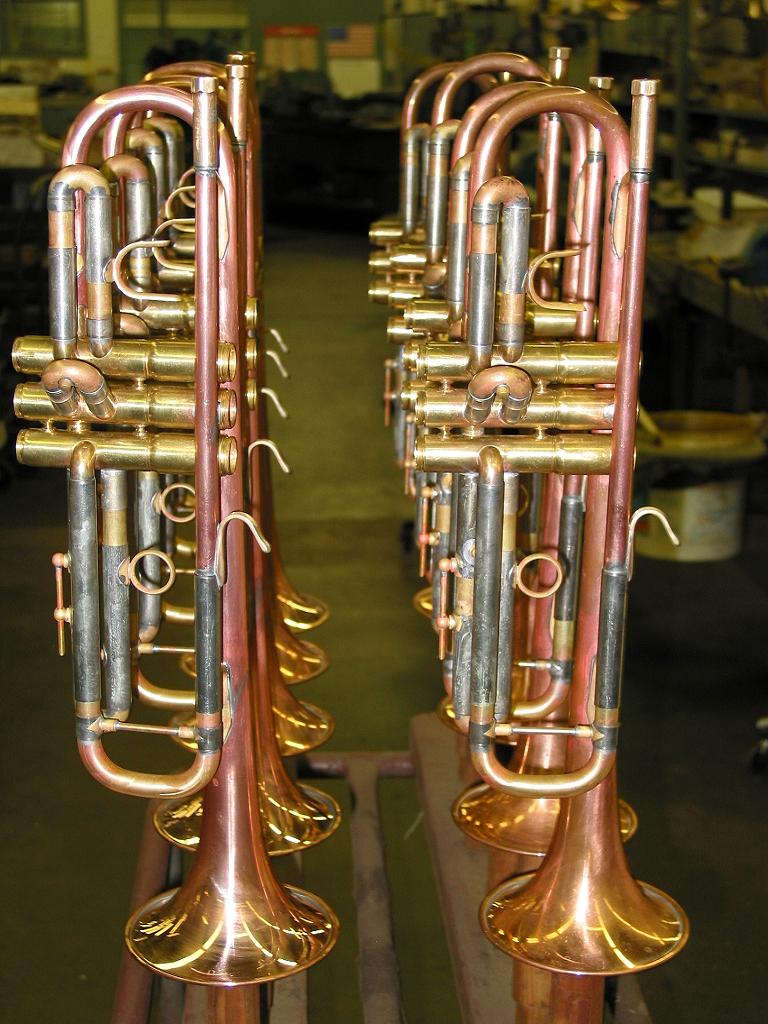
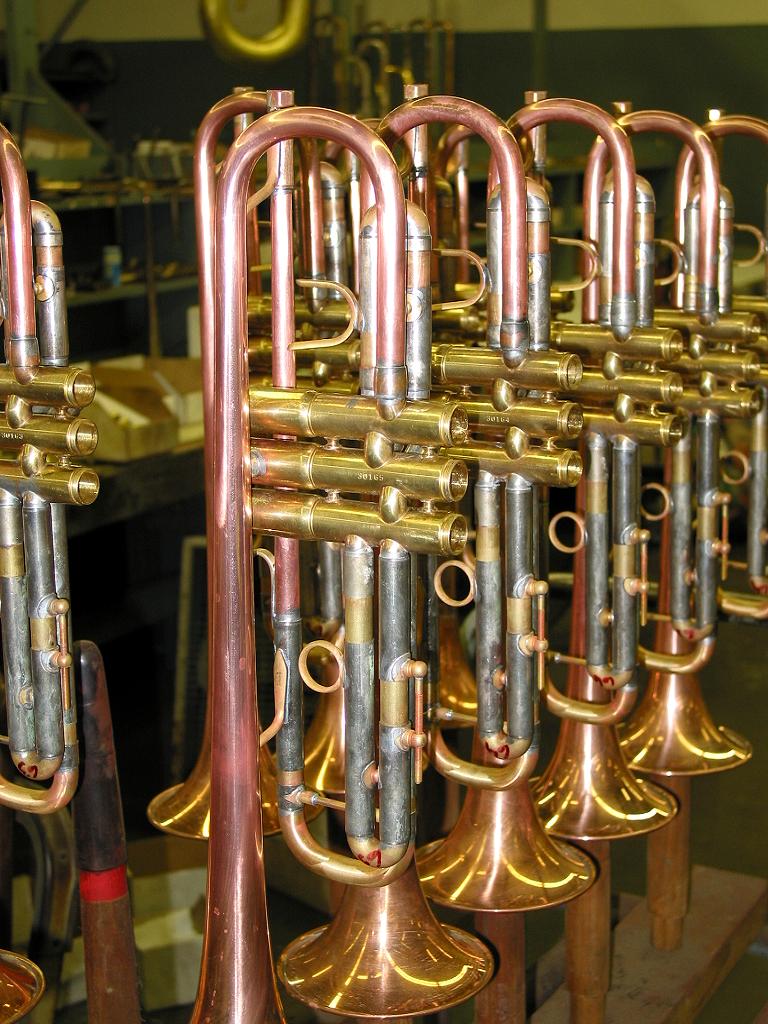
Here you see the valve sections after they have been soldered together with the slide tubes (knuckles) attached.
The person in the background is performing a very interesting operation by which he draws steel balls through the casing knuckles and the piston valve ports in order to round out the channels in each valve.

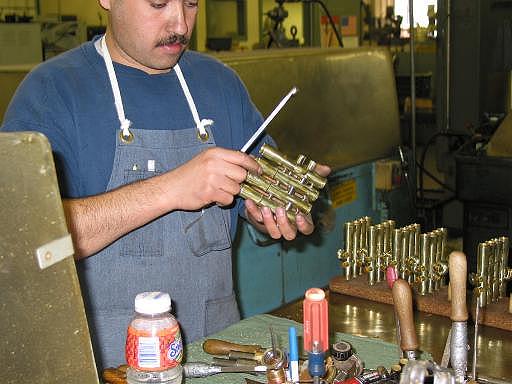
Initially, the valve casings are reamed to size by that white boring machine in the background.
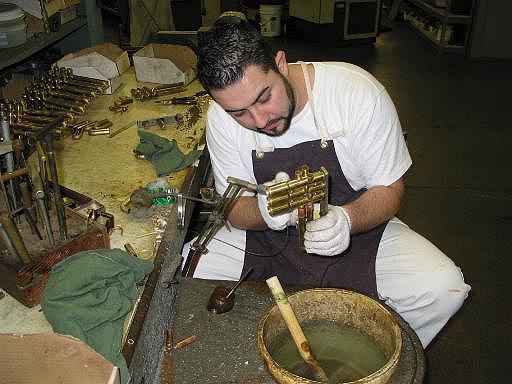
Later after the instrument is assembled and is ready to be fitted with valves, each piston is hand lapped in its own casing for that perfectly tight fit with very close tolerances. Each valve must be lapped to conform to its own valve casing.
Lapping is the hand fitting of the valves using an abrasive compound (like sandpaper cream). In this way both the valve and the inside of the casing will take on the same shape and conform to each other, giving the player flawless valve action and efficiency. Lapping also makes the surface of the piston valve and the inside of the valve casing very very smooth. The goal is to get just the right tightness in how the valve fits the casing. A valve that is too loose will hesitate and leak air and a valve that is too tight will be slow. So the fit is crucial.
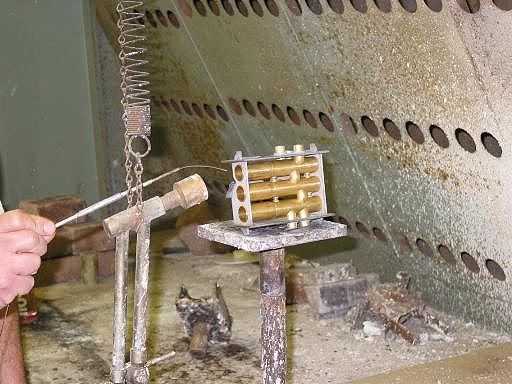
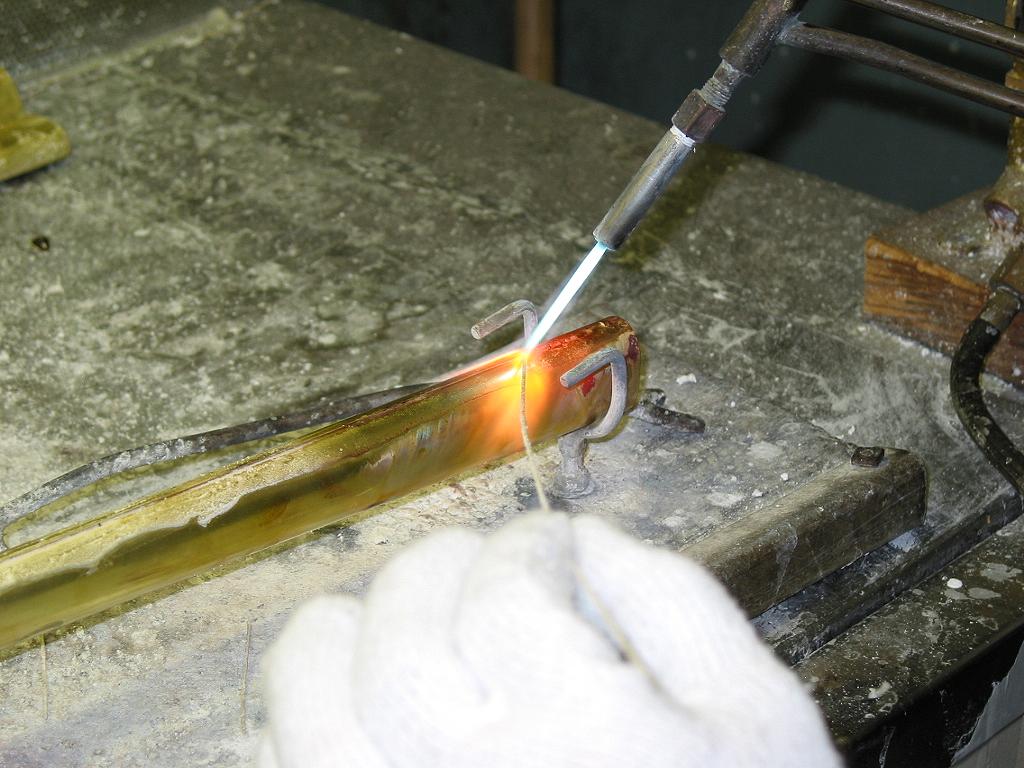
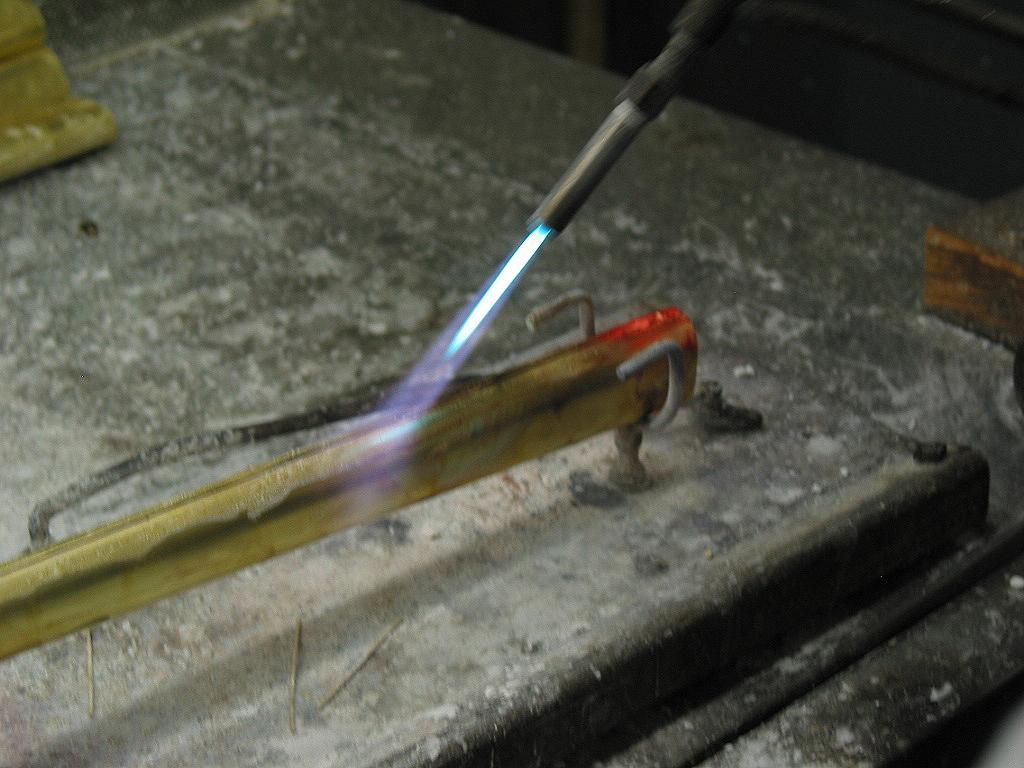
Soldering on the knuckles to the valve casing. The metal must become red hot for the silver solder to flow. It will then be a permanent structure.
Soldering the individual slide tubes to the valve casings.

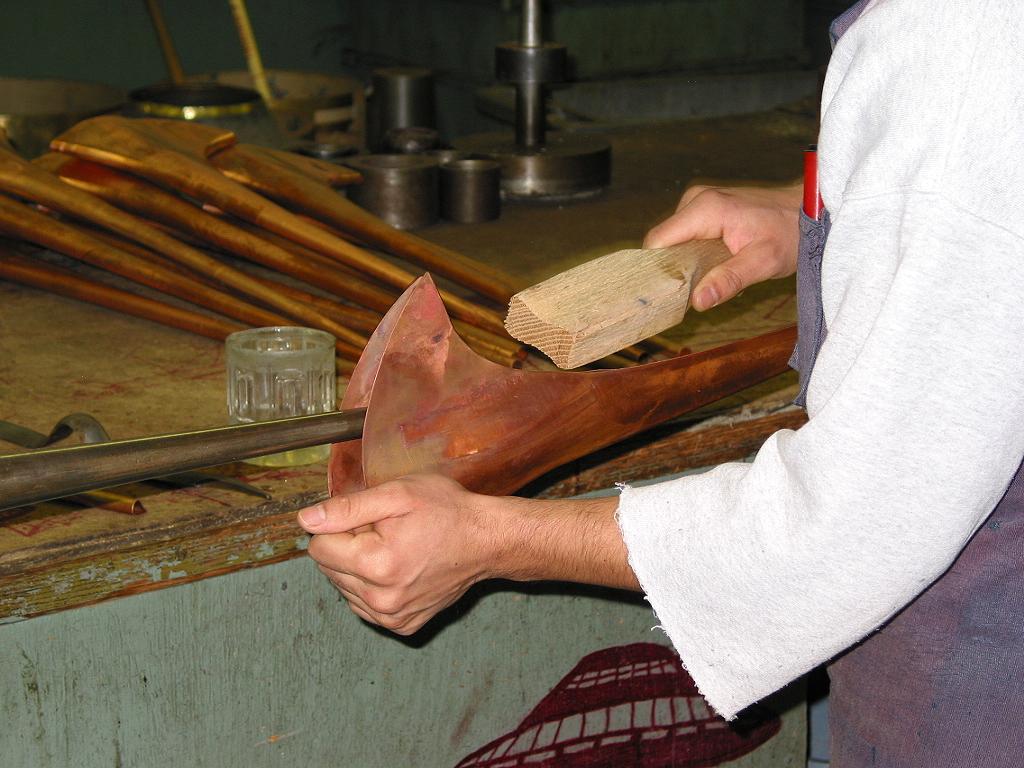
Soldering the bell to the valve section.
As of January 2004 this is the valve section for the future ZeuS Piccolo. Very exciting indeed. You can just tell its going to be great.
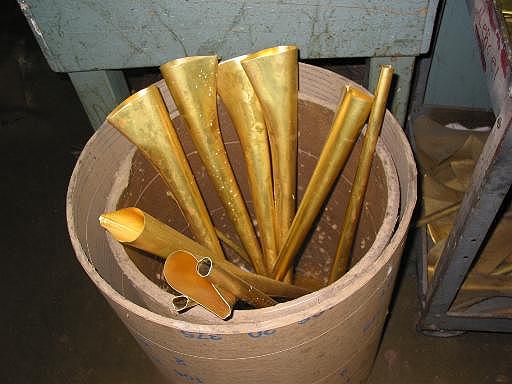
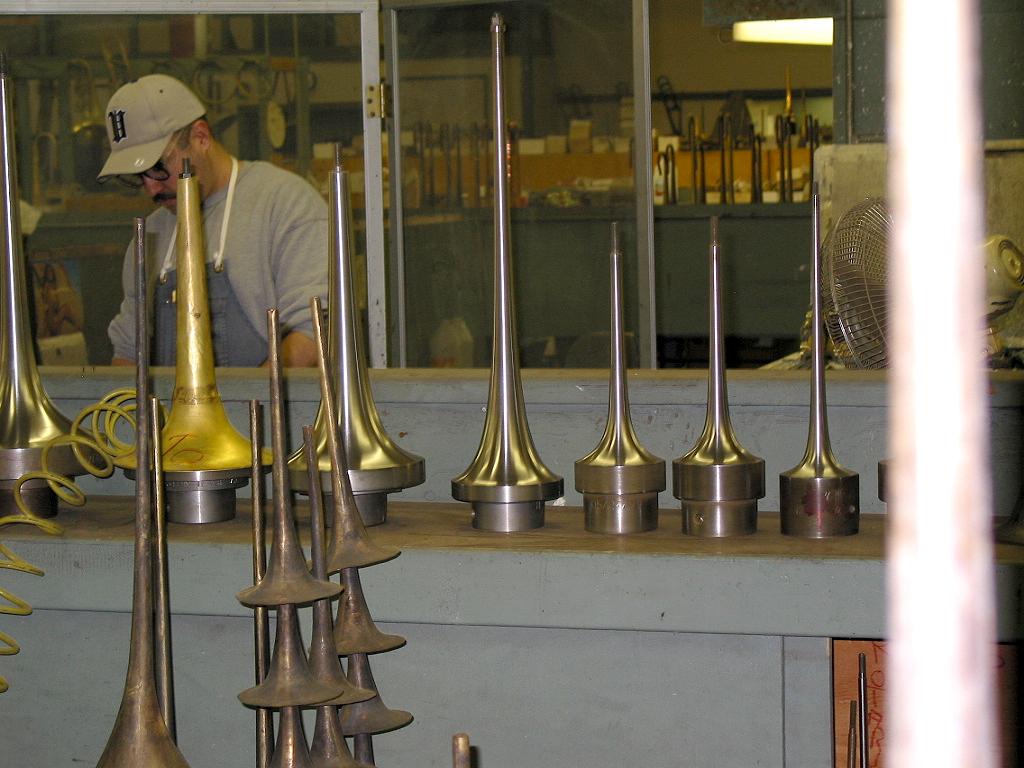
Bell Making
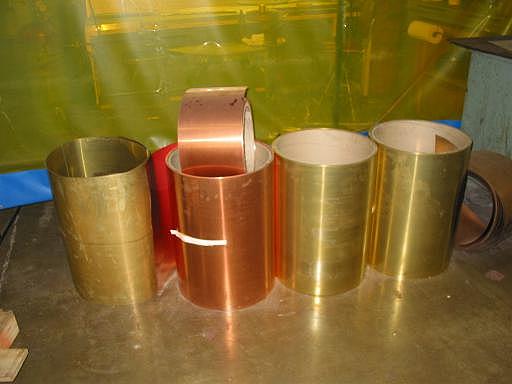
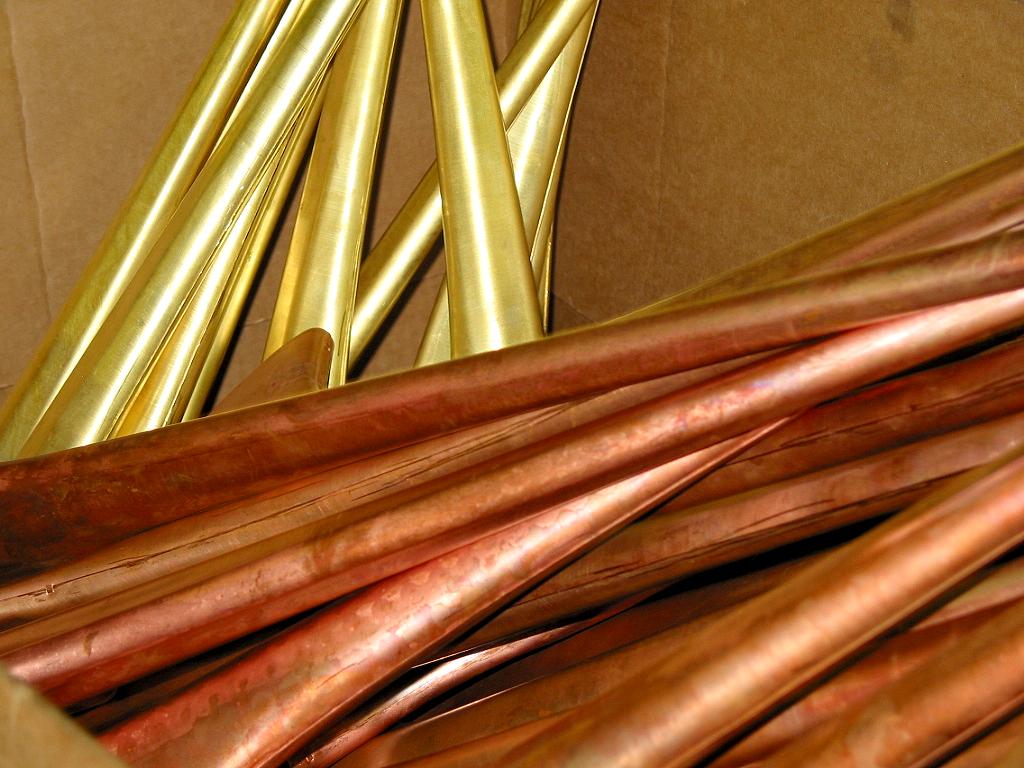
The various sheet metal used for bells. Individual bell shapes will be cut from this sheet metal just like in the garment industry.
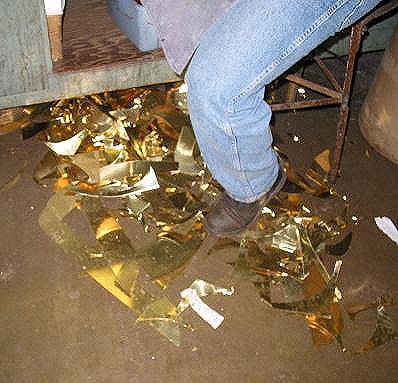
This is the waste material that is left after cutting the sheet metal to make bells. Copper and brass is valuable and all scrap is sold.
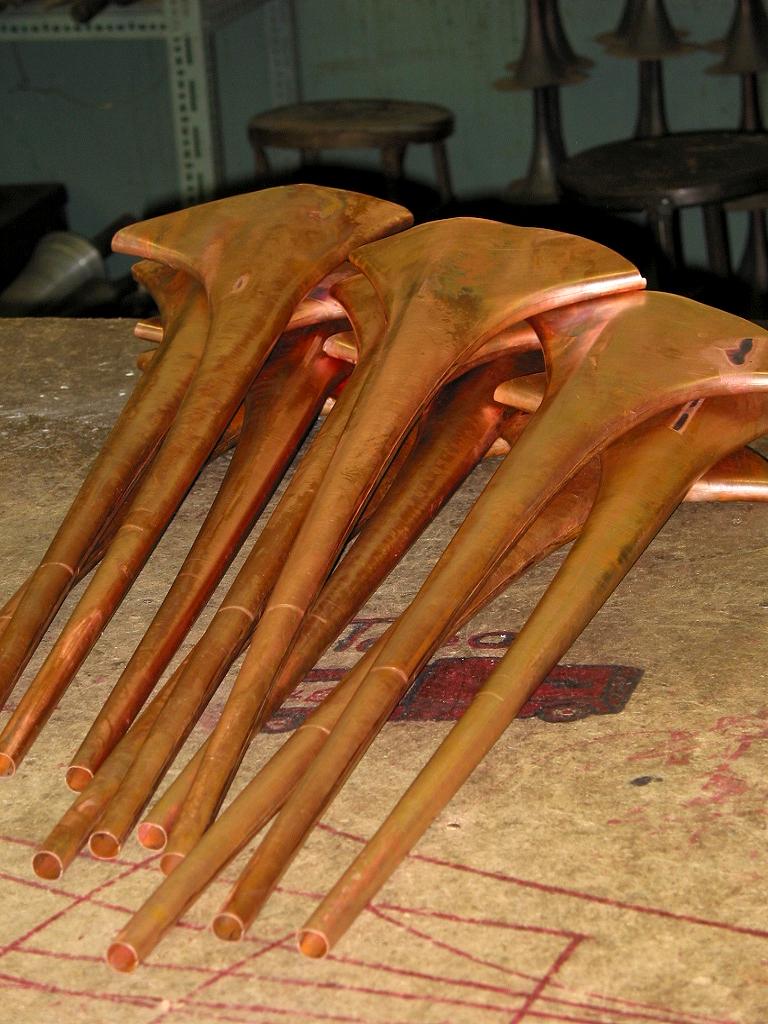
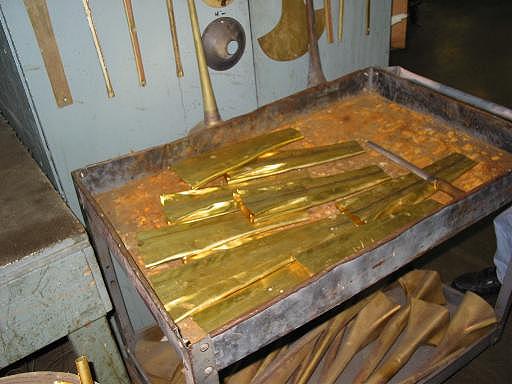
Showing the various stages of bell making. Two piece bells are on the left and single piece bells are on the right.
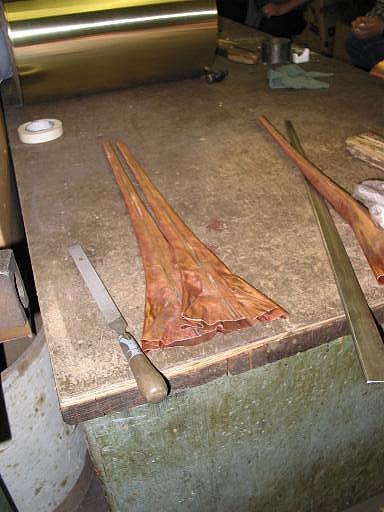
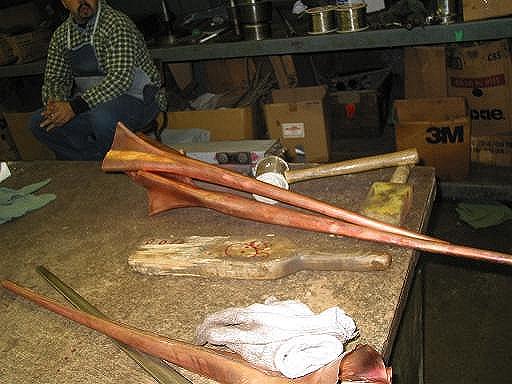
Sheet copper has been cut to shape and then soldered together down the middle. You can see the seem going down the length of the bell. This process is very much like making clothes. They use a pattern to cut the sheet metal to the proper shape. Its hard to believe that these will be beautiful copper trumpet bells. These will be one piece bells as opposed to the two piece bells pictured below.
The bell stems of two piece bells waiting to be soldered to the flare part. Two piece bells are made of two parts, the bell flare and the bell stem. These are the stems.
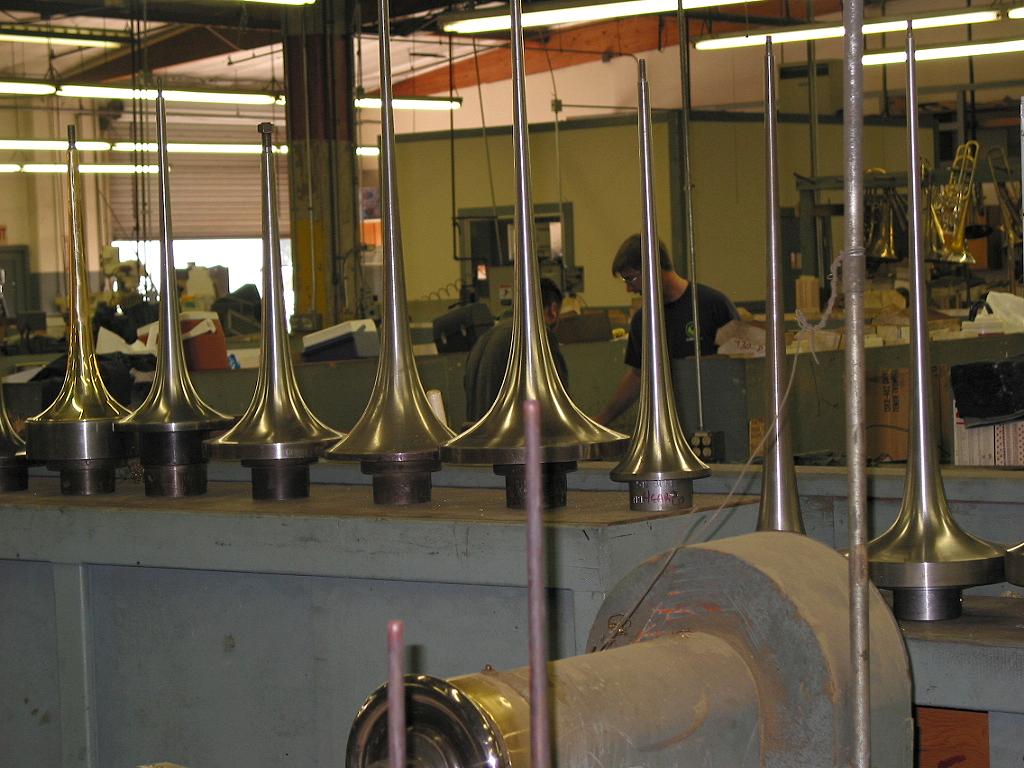
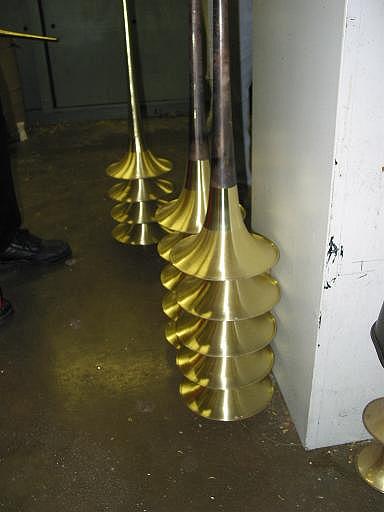
These are the various steel mandrels use to spin bells by hand on a lathe. Each model instruments needs a different size and shape bell, thus a different mandrel must be used.
Its hard to imagine these will be beautiful trumpet bells. They will be, after the bell maker is done spinning them on his lathe. Remember the best instrument making is still done by hand not computerized machines. Many of the techniques you see here have not changed in hundreds of years.
What the neck is that mess? It could be the bell of your ZeuS trumpet.
Hey, this does not look very high tech. Some things remain archaic for a reason, they work.
Okay, the one on the bottom will sound the bets I think. I will take that one.
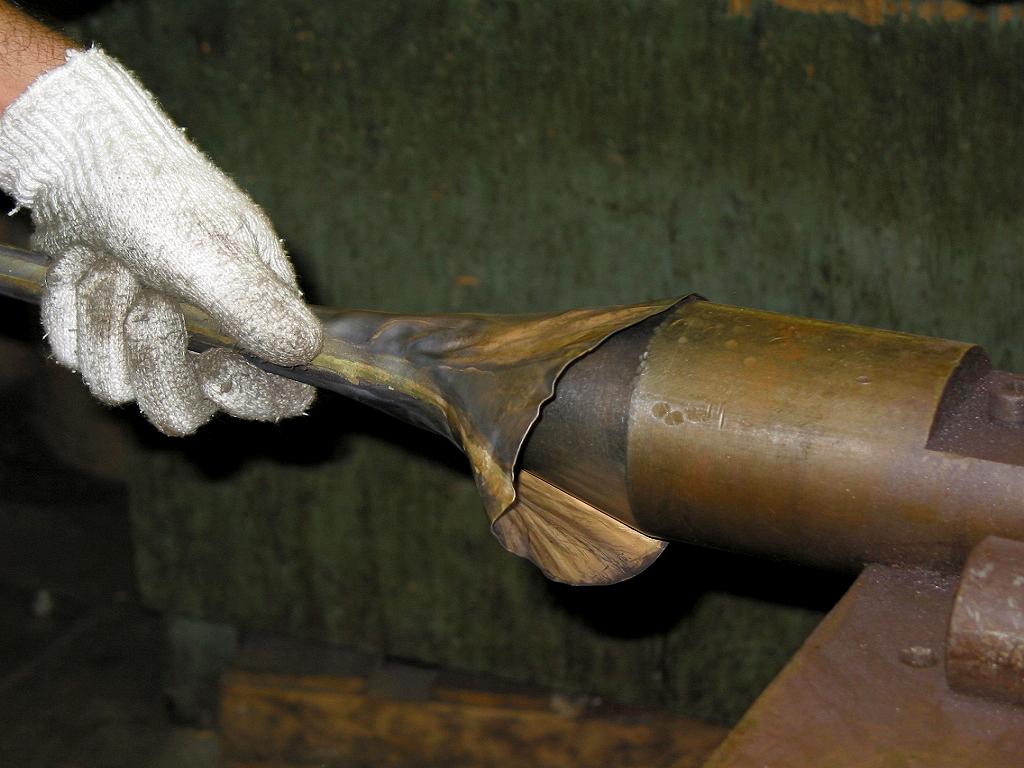
Ever wonder why you can see the seam on a copper bell. Because its made of sheet metal and brazed together with a brass alloy to form a tapered tube. I always liked the look of that seam. You can really see how the thing was made by hand.
Remember, it must get red hot for the solder to flow and fuse the seam together. This also softens the brass greatly, called annealing. Brass needs to be annealed to be worked and shaped easily. As brass or copper is shaped or hammered it work hardens and becomes much harder.
The stems of two piece bells brazed together in to a tapered tube.
Here we go again. Do you really believe this will become a beautiful trumpet bell?
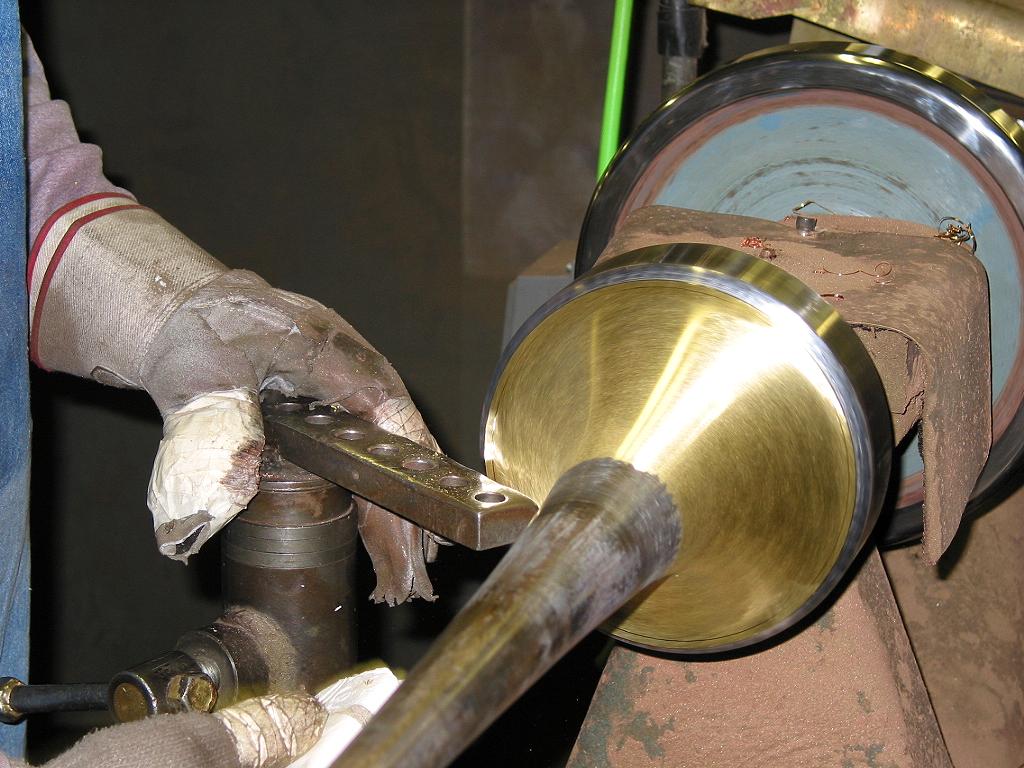
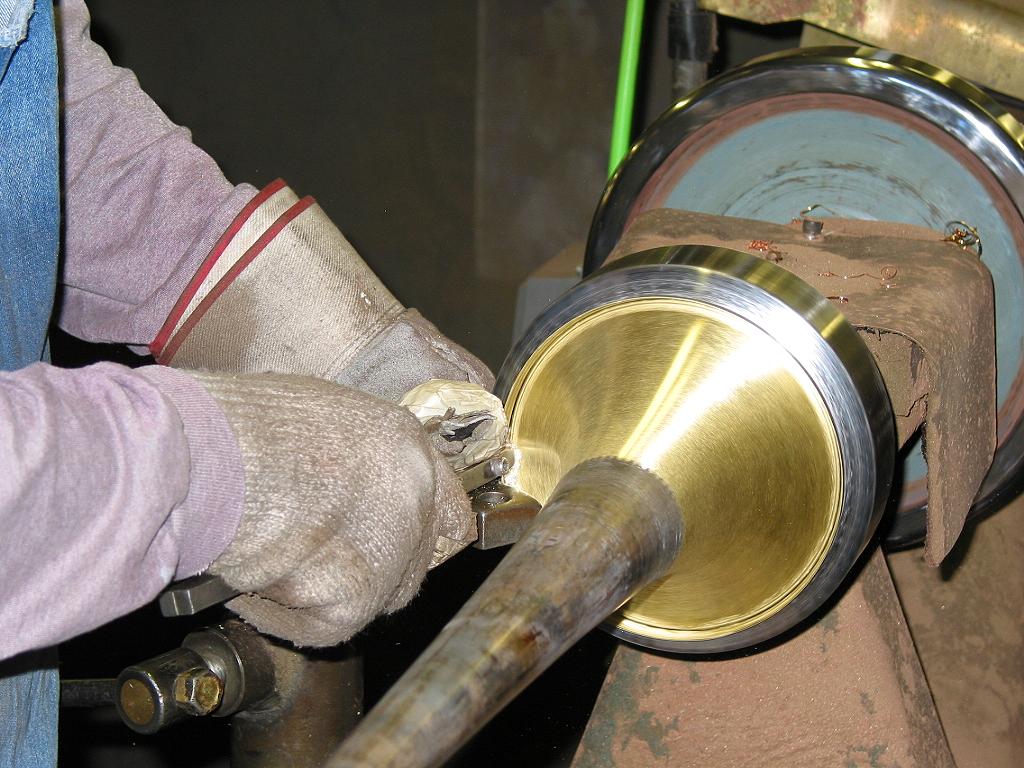
Using a soft mallet to give the bell its initial shape.
On the top shelf you see sheet brass cut to shape and soldered into a tube. Just below you see the next step of hand forming this sheet metal to a shape that barely resembles a bell. The bell spinners are the ones that finish the bell as we know it.
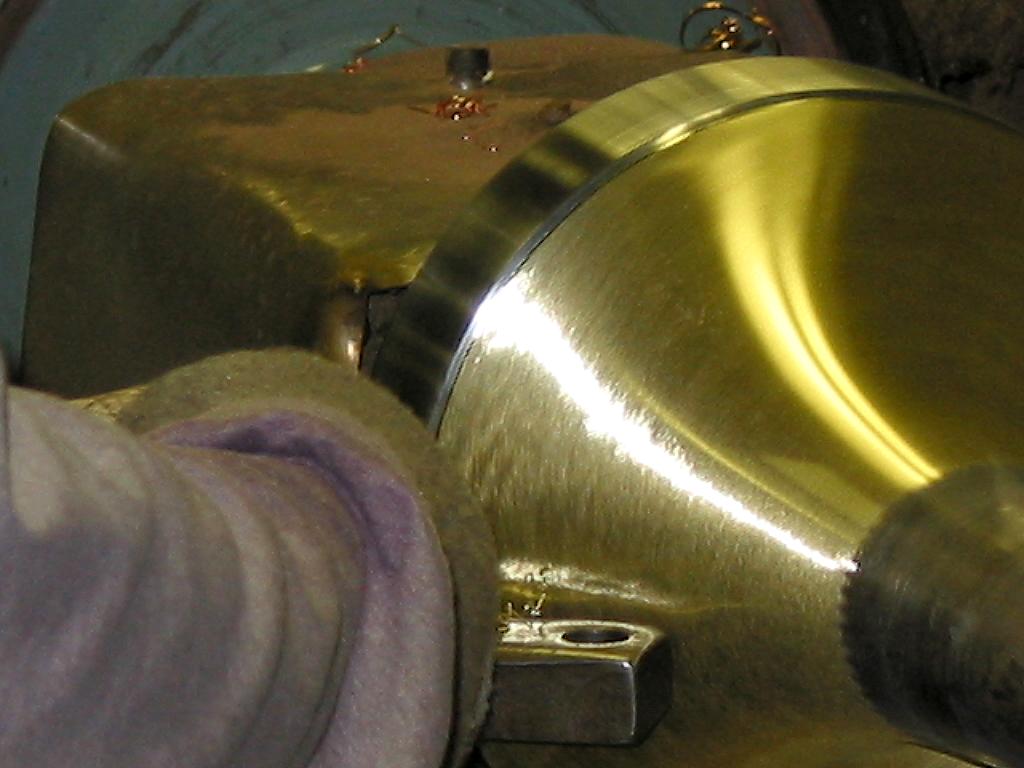
Once these wrinkly bells are placed and spun on these mandrels, they will take their usual flawless shape.
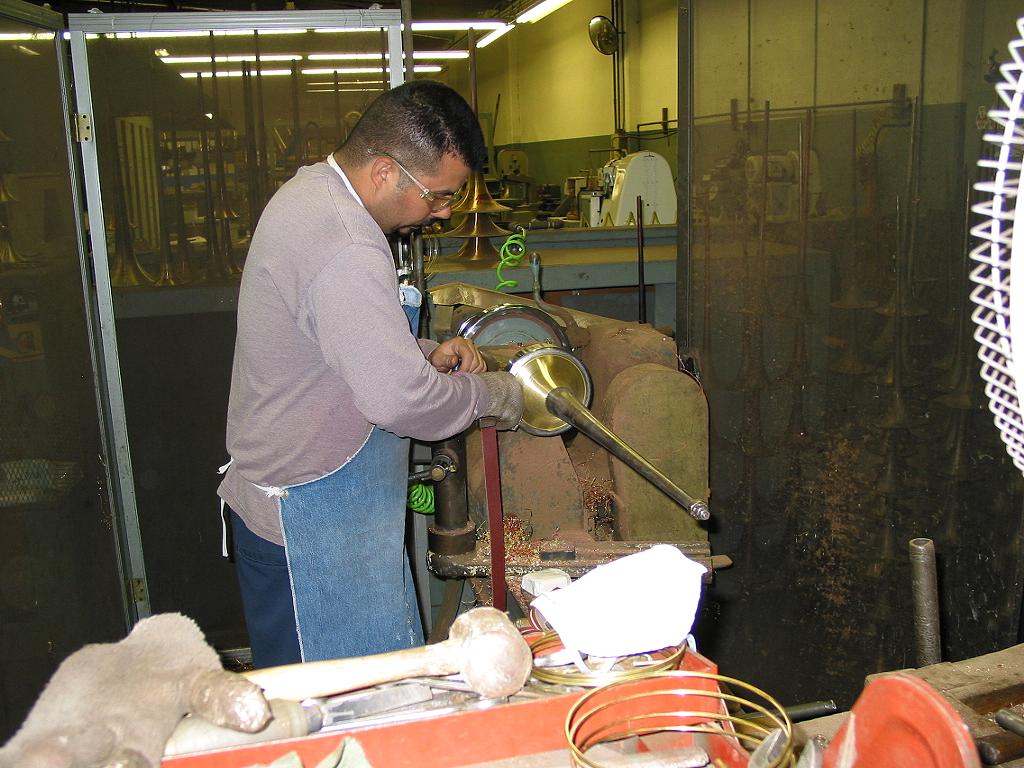
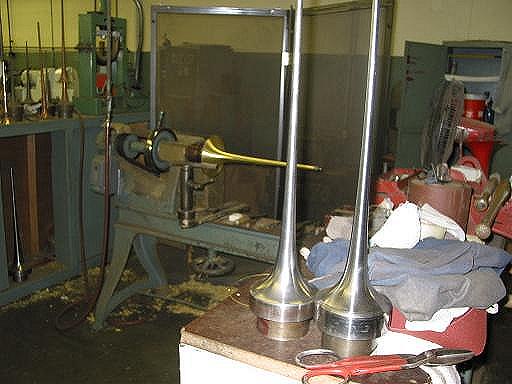
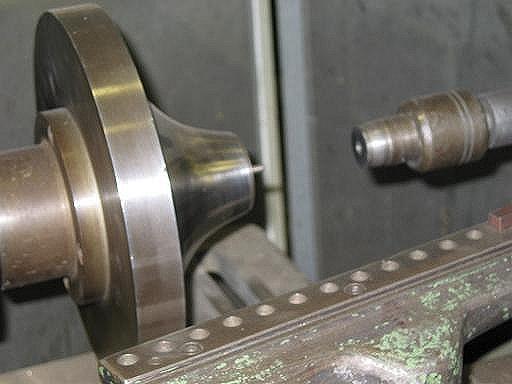
That is a bell spinning lathe in the background. In the foreground those are bell mandrels. A mandrel is steel shape that is the exact shape of the bell which will be spun on it. The mandrels are placed in the lathe which spins it while the bell maker forms the bell metal to take the shape of the mandrel. In order to do this the bell must be annealed which is a process of heating the bell red hot in order to make it softer and malleable. It is necessary to anneal the bell several times during the spinning process because the bell becomes work-hardened in the process making it hard to work with. A different mandrel is needed for every bell shape. The bell maker uses hand held metal shapers to form the brass material and make it take the exact shape of the steel mandrel over which it is placed..
This is a spinning lathe with a bell flare mandrel used to shape only the bell flares which will part of two piece bells.
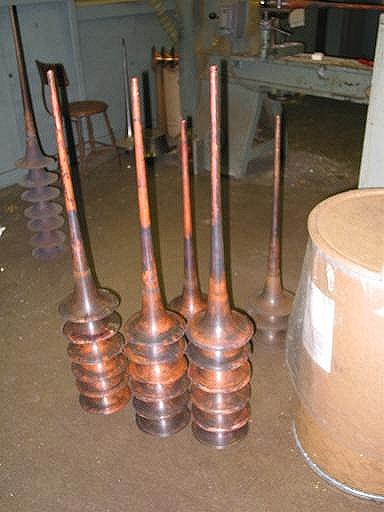
Bells that have just been spun by the lathe in the background. The discoloration is due to the annealing process.
These bells have just been hand spun on the spinning lathe.
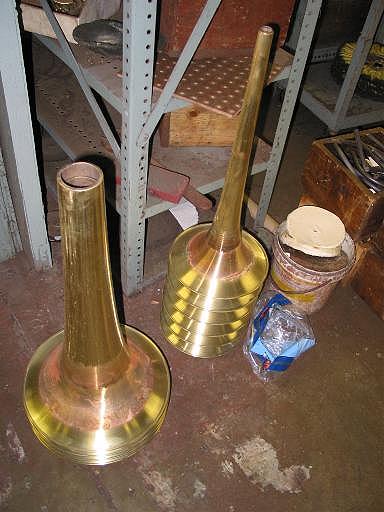
Finished two piece bells. You can see the color variation between the two pieces, the flare and the stem.
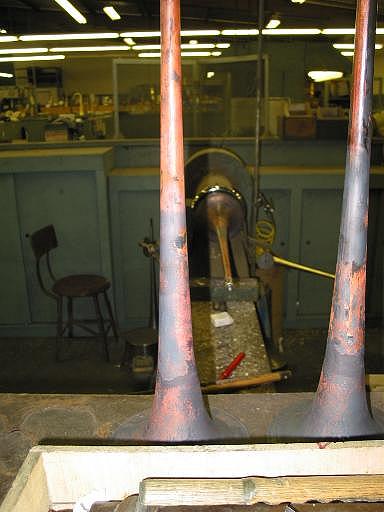
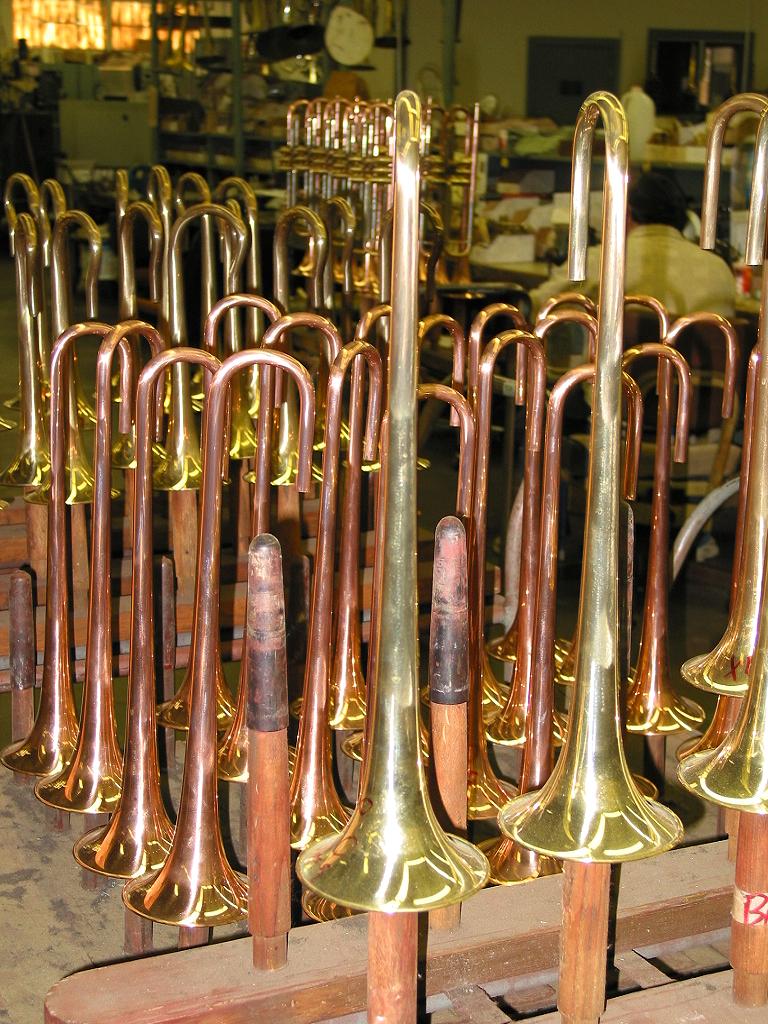
Spun single piece bells ready to go to the bending machine to have the crooks bent into a U shape.
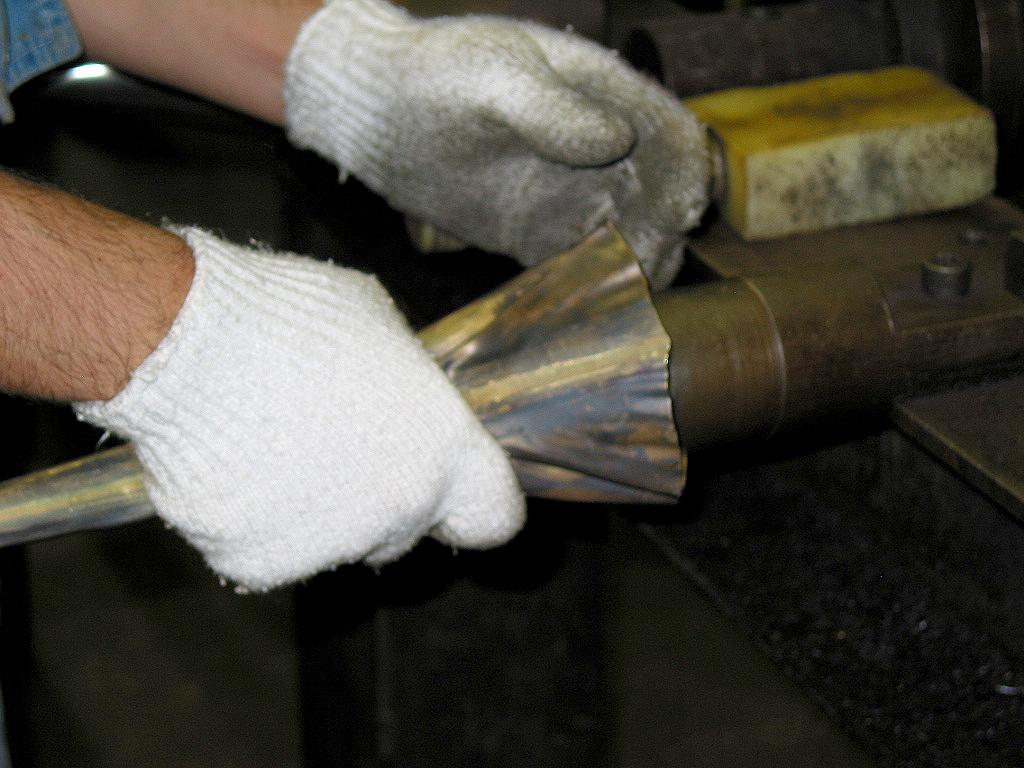
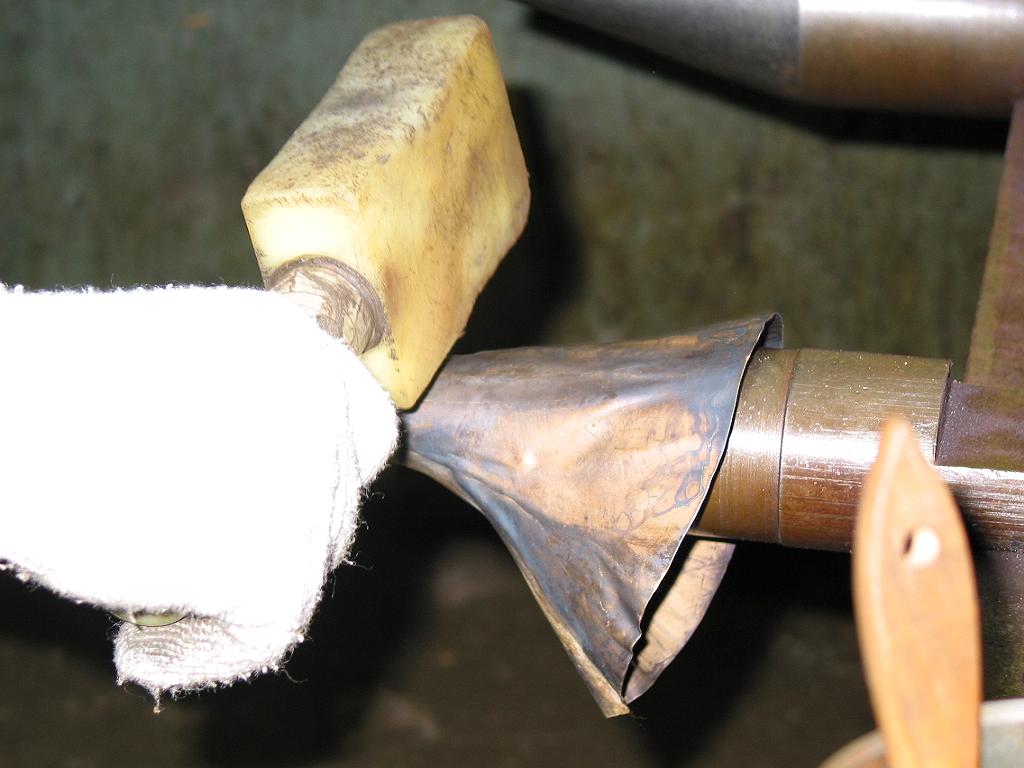
Installing the bell wire. Did you ever wonder how that was done. Don't try this at home the sharp edge of the bell will cut off your fingers.
Thick leather gloves are not a bad idea.
There we go. I think the bead (or wire) is already on and now the edge of
the bell must be rolled over the wire.
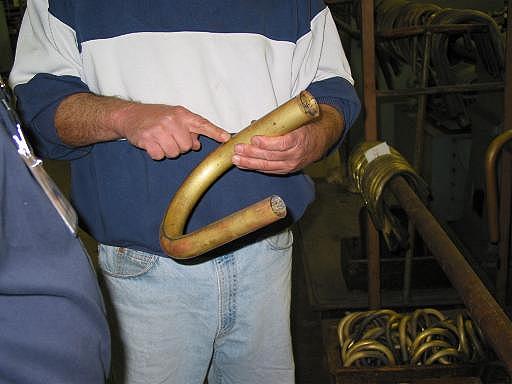
Explaining how a tar-like material has to be pored inside a tube before bending it so that the tube does not collapse in the process. Even though brass is a soft metal, a lot of pressure must be used to bend the tubes. Wrinkles or creases can not be allowed or you will complain as a customer. This is why the inside of the tubes must be filled with a rigid tar, which is melted and removed after the bending is finished.
Something very interesting, the inside of smaller tubes such as the bend of a trumpet bell stem is filled with a mixture of water and soap. This is used because a soapy mixture will not freeze as hard and will not expand as much as pure water. This ensures that the thin walls of the tubes will not crack or split.
Its cold in there. This is where the bells are placed in order to freeze the soap and water mixture inside the bell. The mixture freezes but as much a pure water would. This way it does not crack the thin wall of the bell. The soap and water mixture freezes just enough to stop the tube from collapsing when placed into the bending jig shown below.
This is the manual bending jig used make the curve in the end of trumpet bells.
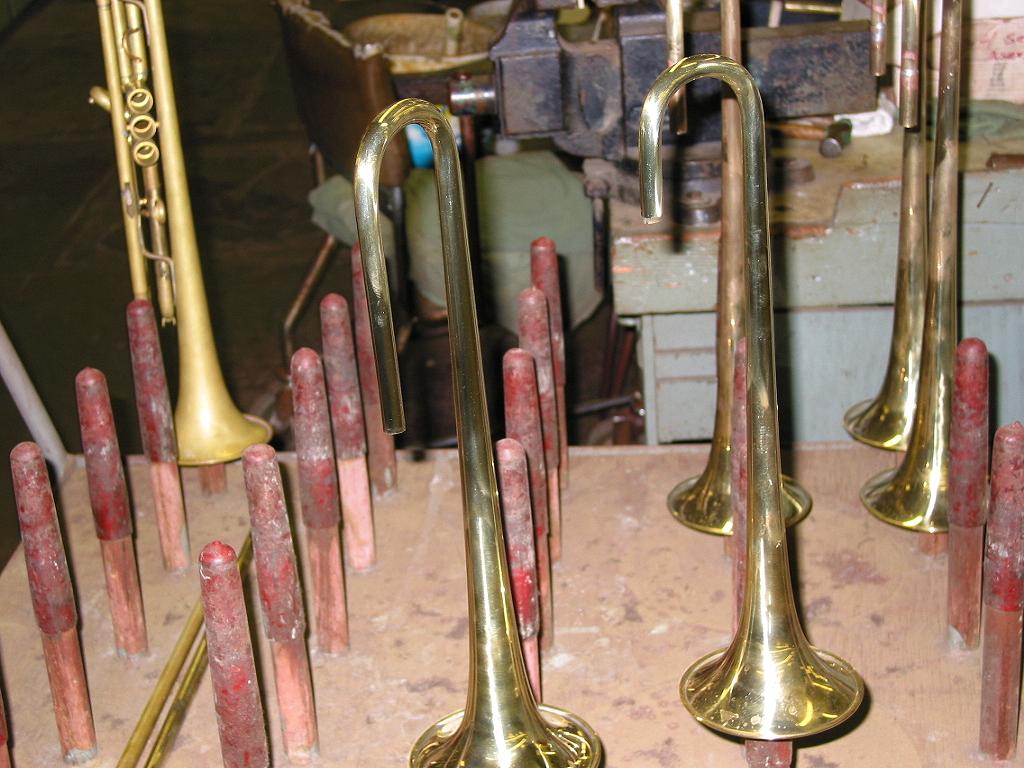
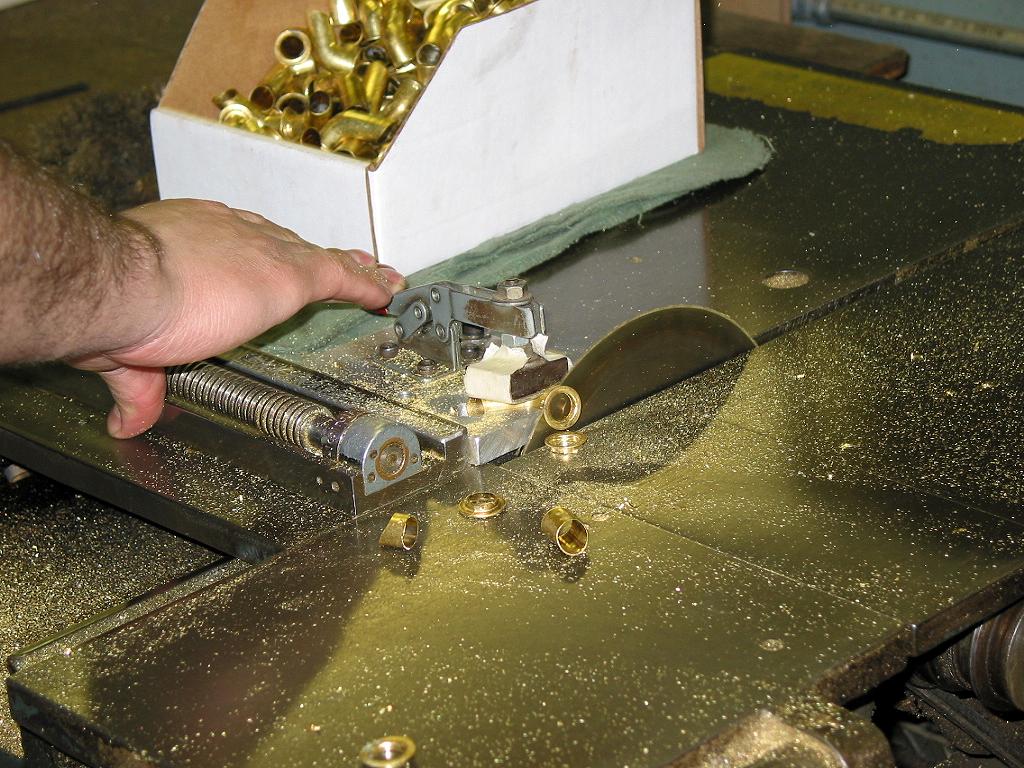
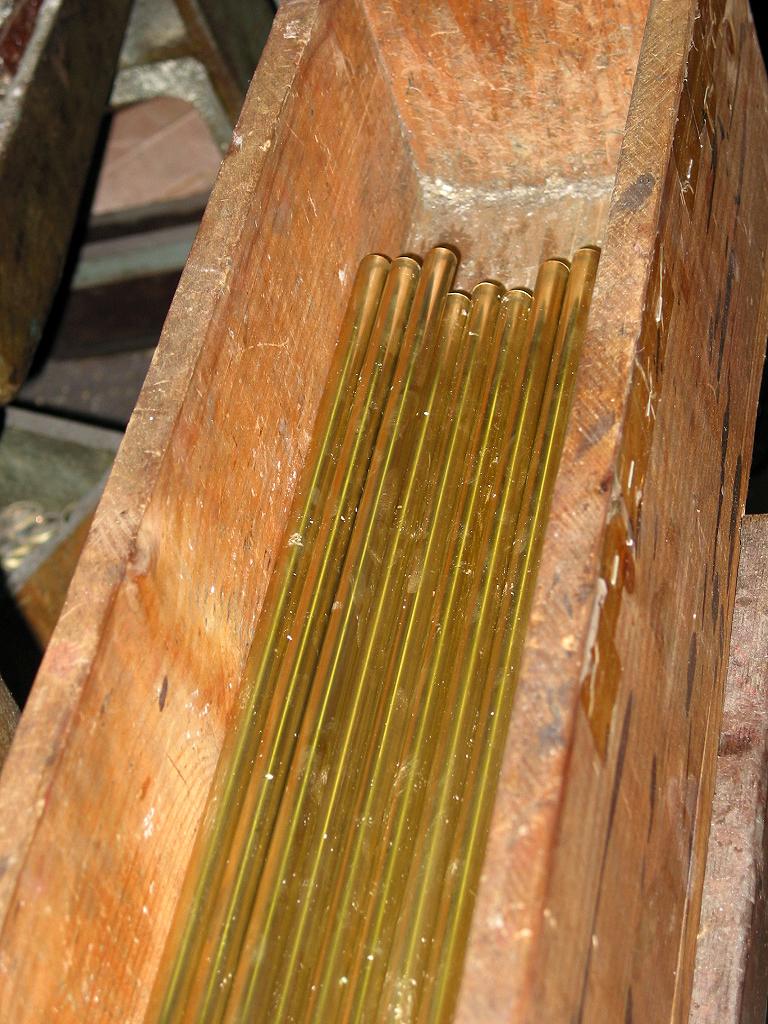
Cutting tubing to just the right length or the instrument will be out of tune.
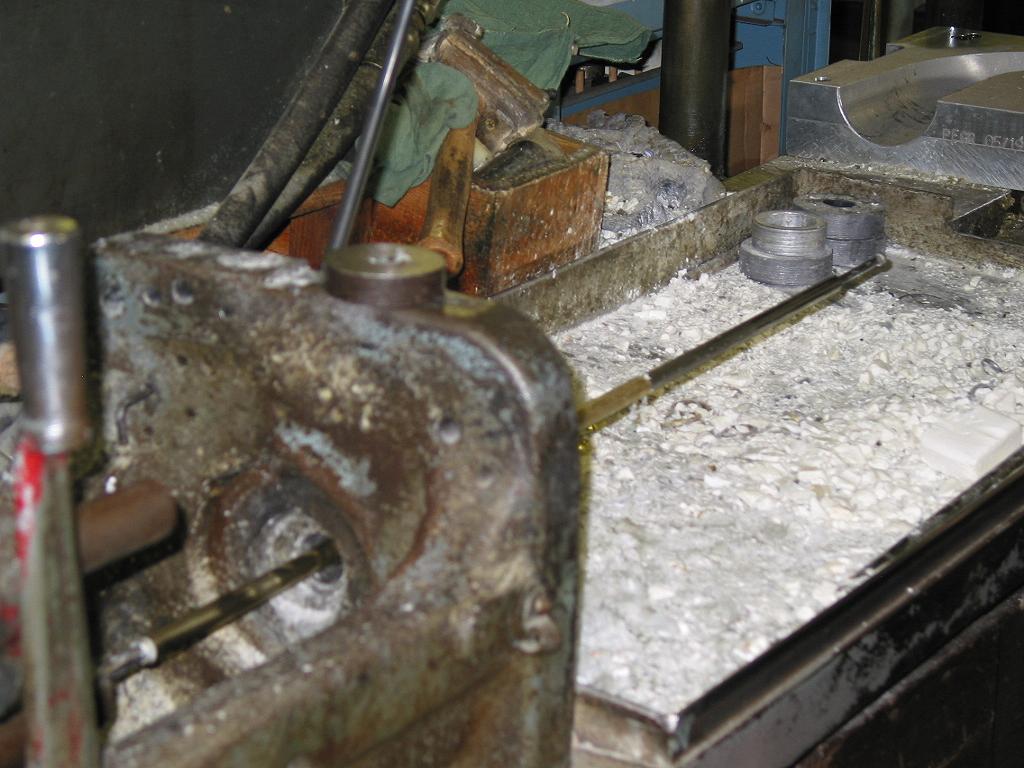
Ever wonder how they make any bore size they want in a tube? They draw it trough a steel ring to reduce it or push a ball through it to expand it. Very clever.
Finished tubes, as straight as an arrow and the right inside diameter.
Filing the surface of a flugelhorn bell, so that its flawlessly smooth for you.
Don't worry, all the file marks will be buffed out in various stages of buffing, starting with a rough compound and finishing with re rouge which will give it a mirror shine.
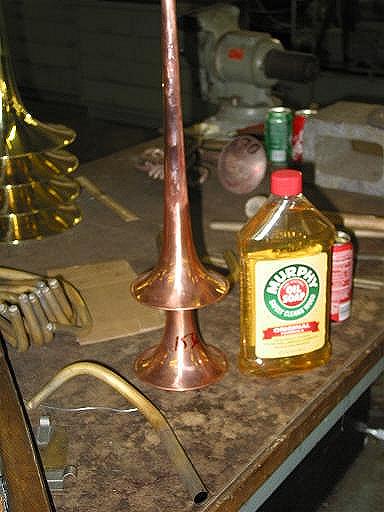
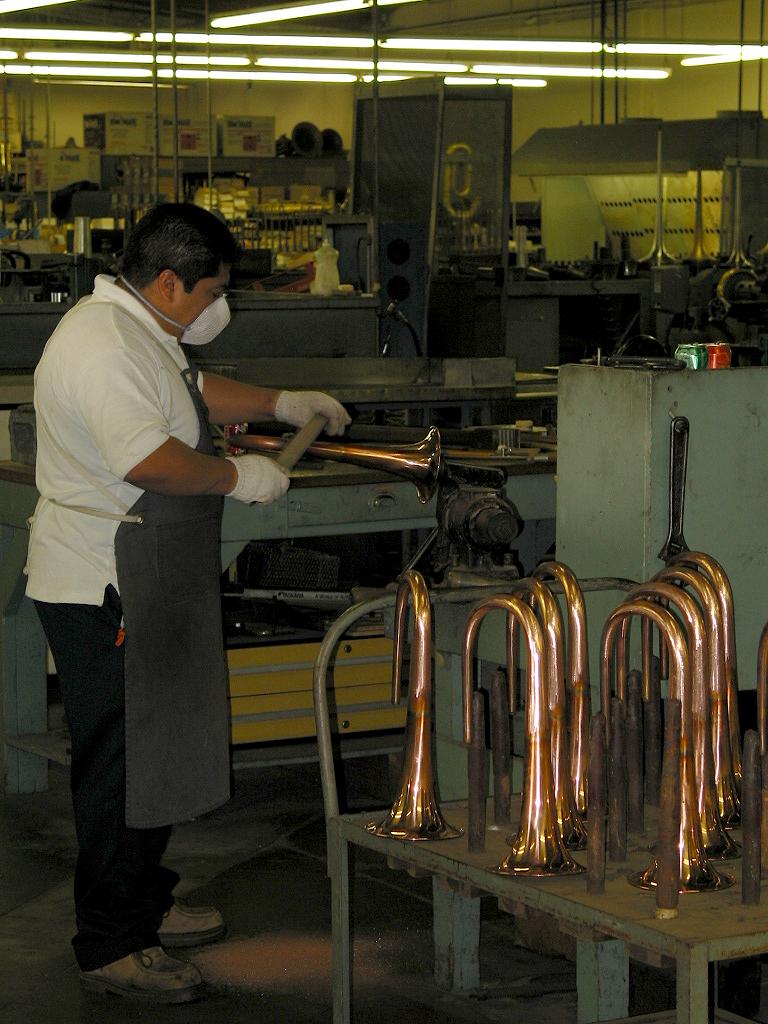
Hey, look! Its a ZeuS Guarnerius trumpet. Who else is crazy enough to have a trumpet with a copper bell and leadpipe.
It is now being soldered together.
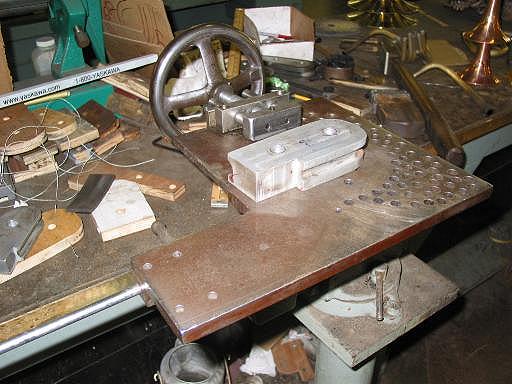
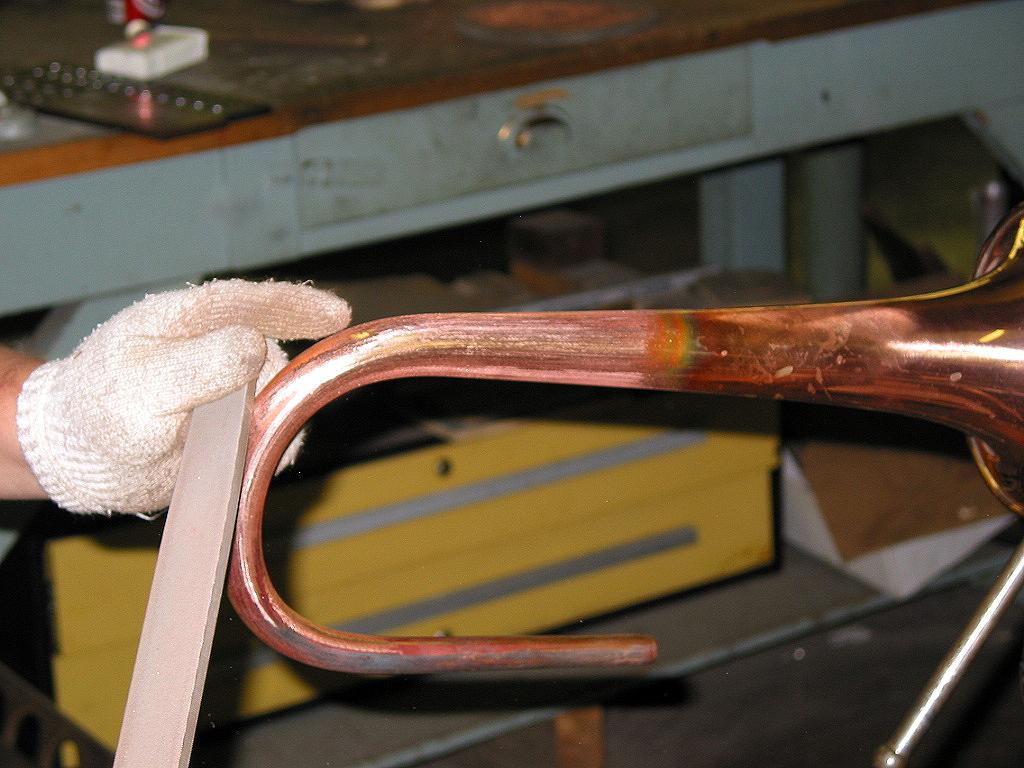
Various jigs are used to make the slides. They must be perfectly parallel to work smoothly. No crooked work here.
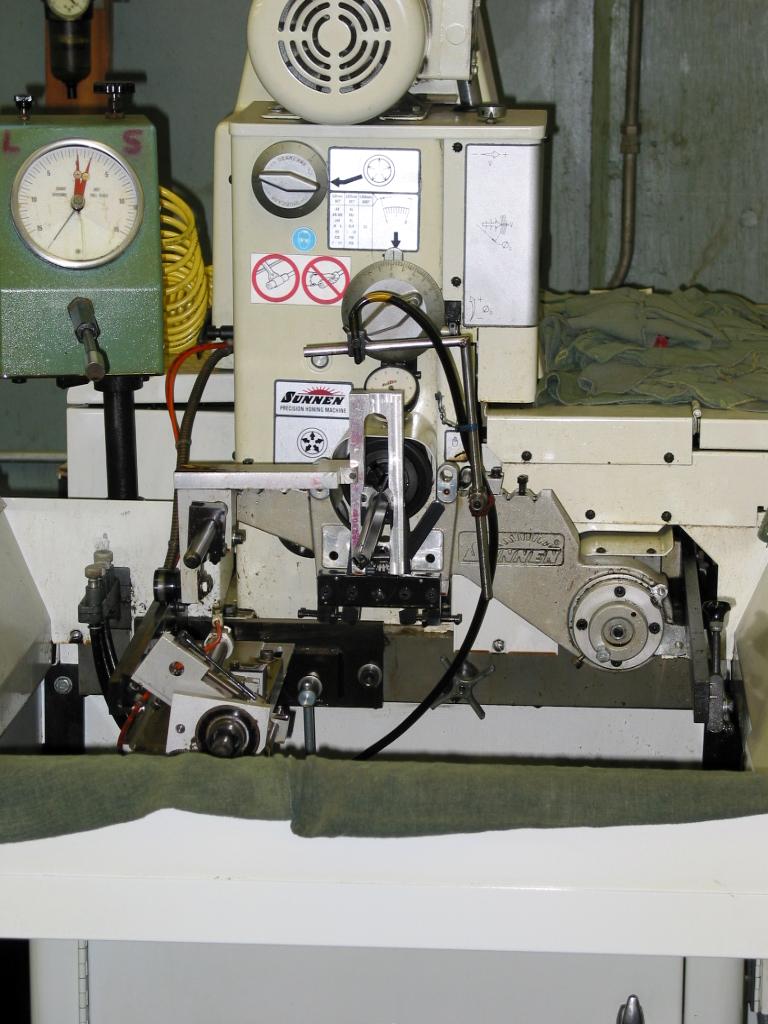
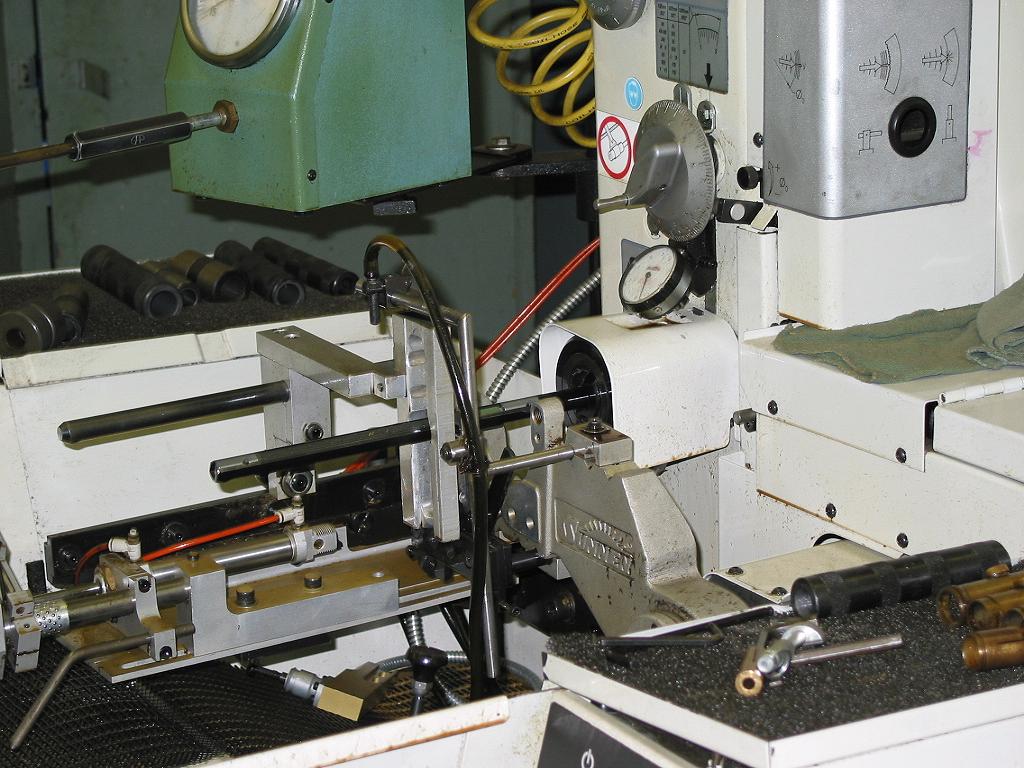
How would you like to hone valve casings all day by moving back and forth with just the right amount of pressure and angle. Pretty soon your work would be less then perfect and you would also be bored out of your mind. So now they use an automatic honing machine which never gets bored.
Here it is again. Its not operating at this time but you can see some valve casings on the right. This machine makes the inside of the casings just the right size for the piston valves.
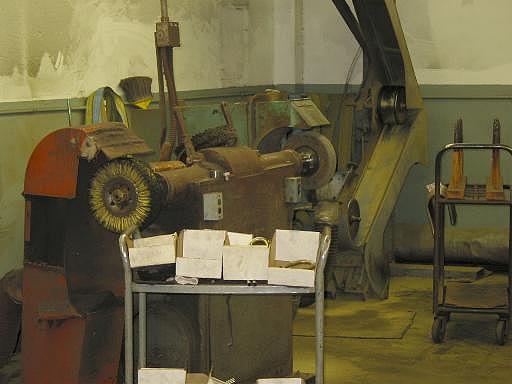
Buffing
There you see how shiny they can make it.
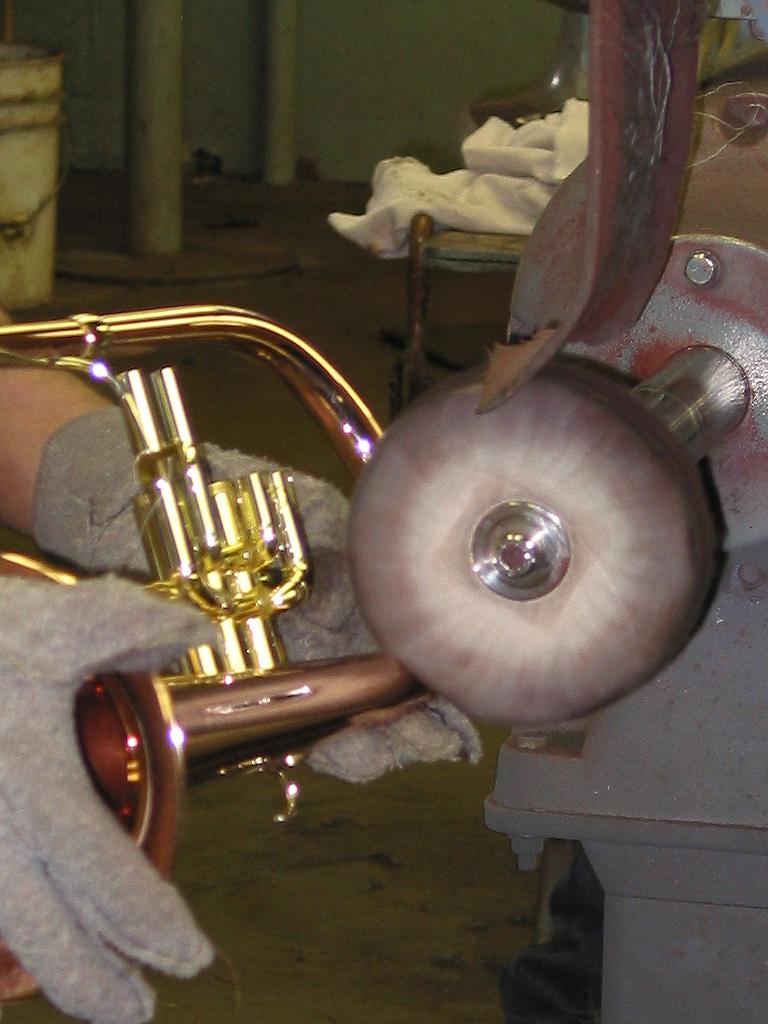
They have to get into every nook and cranny. This is a hell of a job and one wrong move and the wheel rips the instrument right out of you hand and smashes it against the ground, the wall or your face. It can get nasty. Not for the timid. Don't try this at home.
Lacquering
All soldered together. These trumpets will now have to be buffed to a mirror shine before they are lacquered or silver plated. Could they be ZeuS Guarnerius trumpets?
Here is one of the many buffing machines. This job takes very high skill because one wrong move and the buffing wheel will grab the instrument and thrown it against the wall or across the room. A nice instrument can easily be mangled and destroyed this way. Despite the dust collection system, this is a very messy job as well and I imagine not very healthy for the buffers. They usually come out of the buffing room looking like red devils. The greasy red rouge buffing compound sticks to everything and is very difficult to remove.
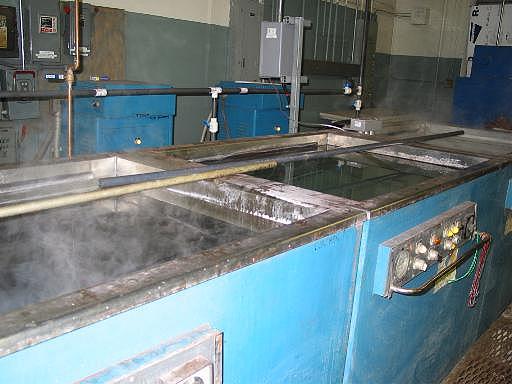
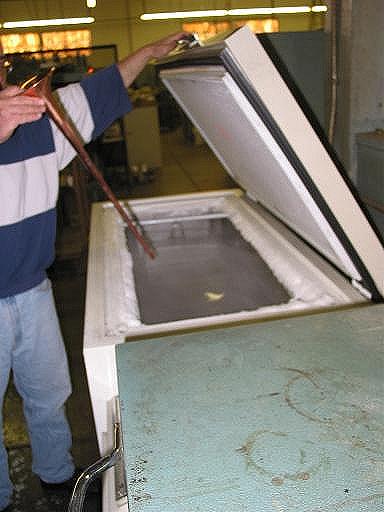
These are special ultrasonic cleaning tanks to completely degrease all parts. All traces of that greasy buffing compound must be removed in order for the lacquer or silver plating to stick to the instruments. This is a very important step. If an instrument is not thoroughly cleaned the finish will be shoddy.
This is the actual lacquering chamber. This area must have exhaust fans and must be absolutely free of all traces of dust. This is also not a healthy job but someone has to do it for you to have a shiny trumpet.
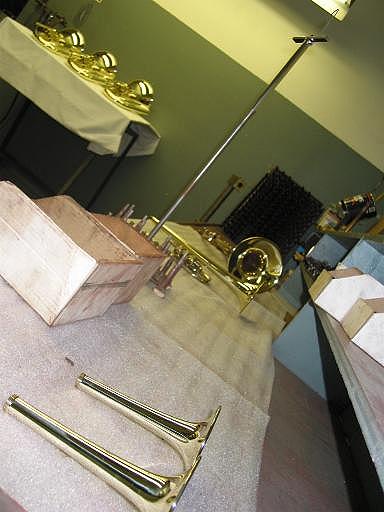
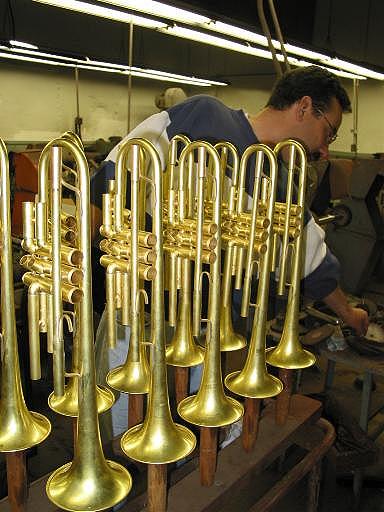
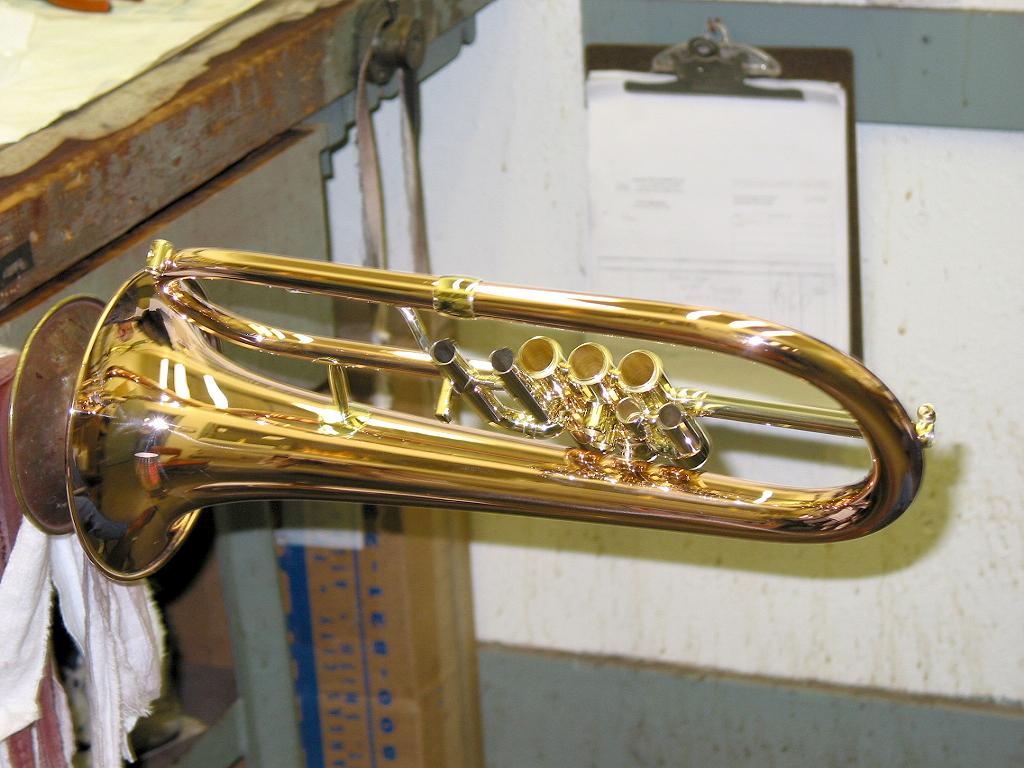
Freshly lacquered trumpet ready for valve fitting.
Lacquered instruments ready for valve fitting and assemble.
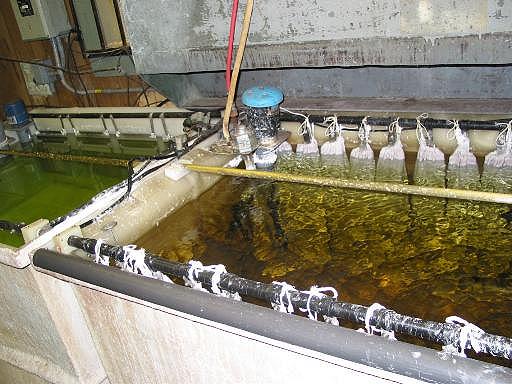
This is the silver tank. All instruments to be silver plated are submerged in this tank. Electricity then makes the silver molecules stick to the instrument. Notice the solid silver bars on the sides of the tub.
Some trumpet finger buttons or valve caps were just taken out of the tank and are now silver plated.
Perfectly silver plated 4-valve piccolo trumpets.

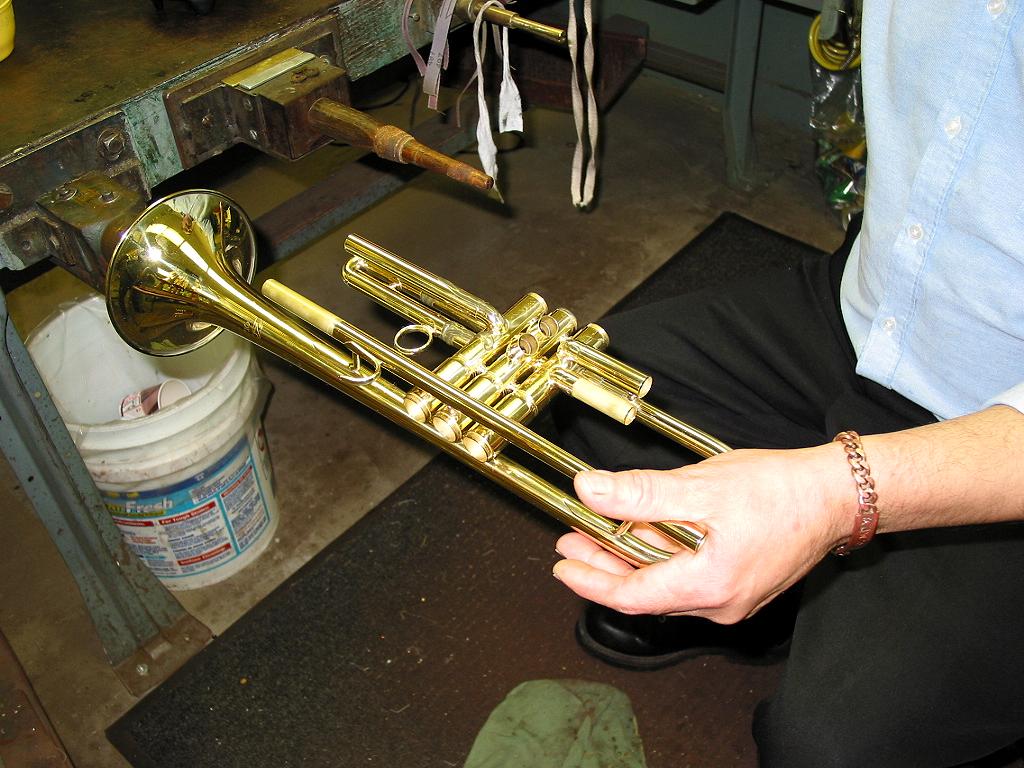
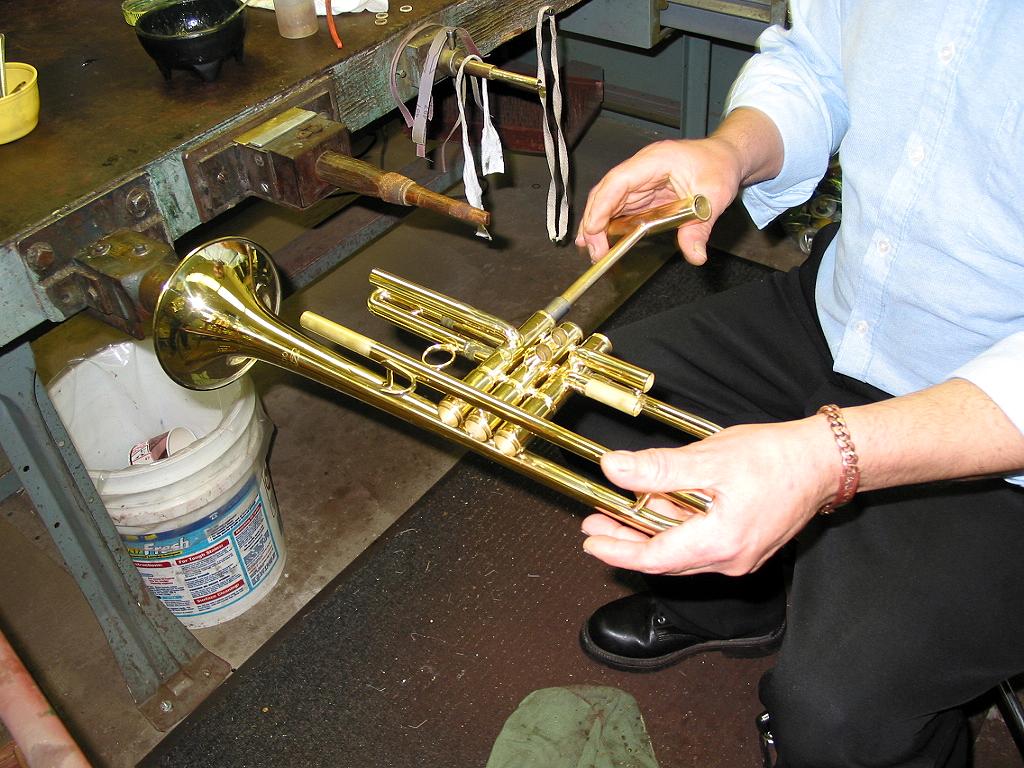
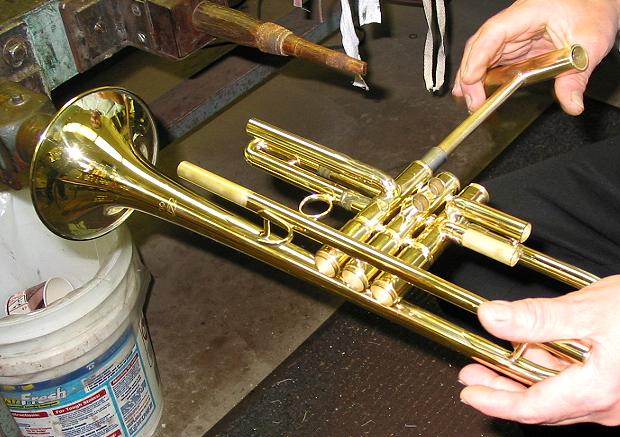
A ZeuS Guarnerius BL trumpet ready to be fitted with valves and slides. Stupid
me, that's not a Guarnerius, its an Olympus of course.
Take a look at the reverse leadpipe design. Silly me not to have noticed.
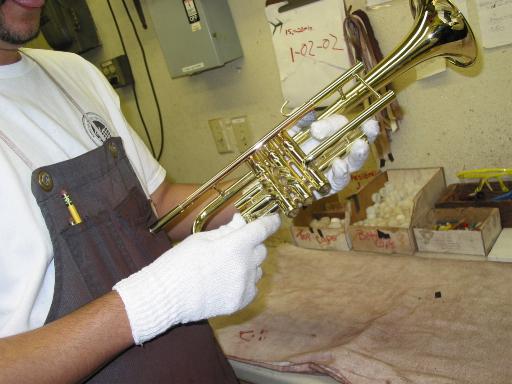
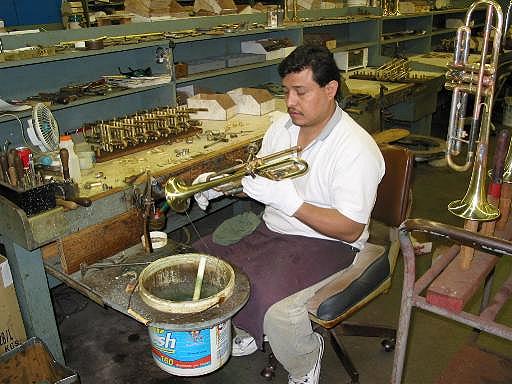
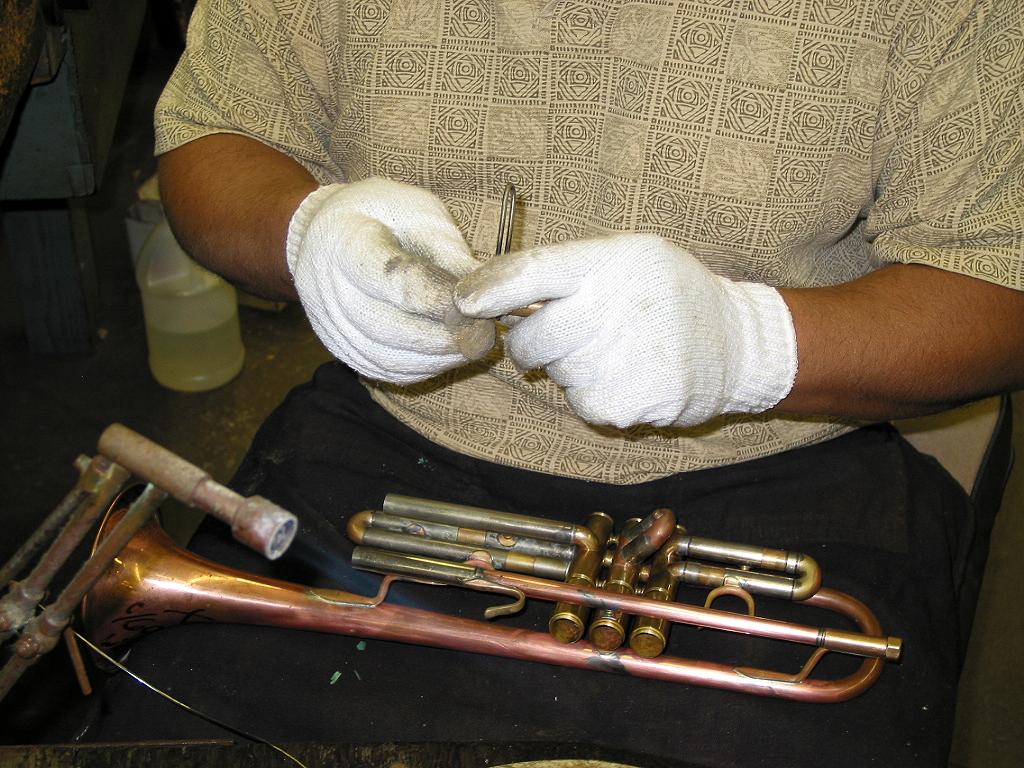
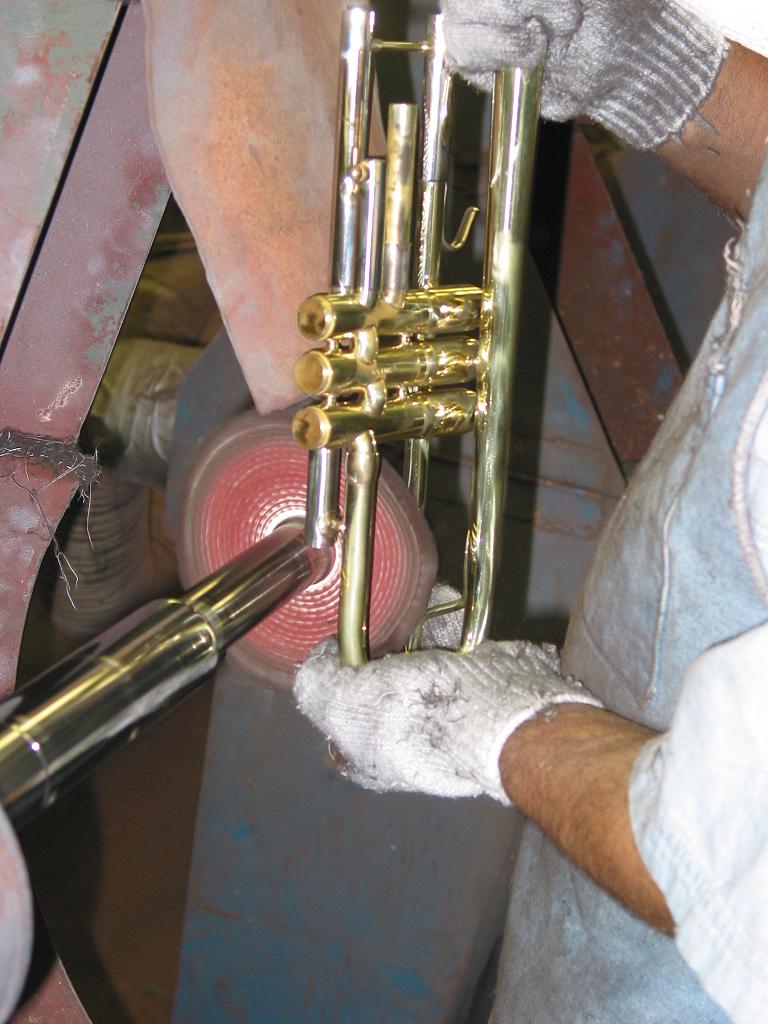
Lapping the valves. He screws a handle onto the actual valve that will go into that casing. He then spreads lapping compound on the valve and moves the valve back and forth in the casing until its a perfect fit is created. Lapping compound is just sand paper in a paste form. If he does not lap it enough the valves will be too tight, if he over laps it, the valves will be loose as a goose and leak air.
Newly lacquered instruments must be handled with white gloves. Would you want fingerprints on your new trumpet?
The valves are sure nice on the Olympus. They use special light weight springs are very smooth.
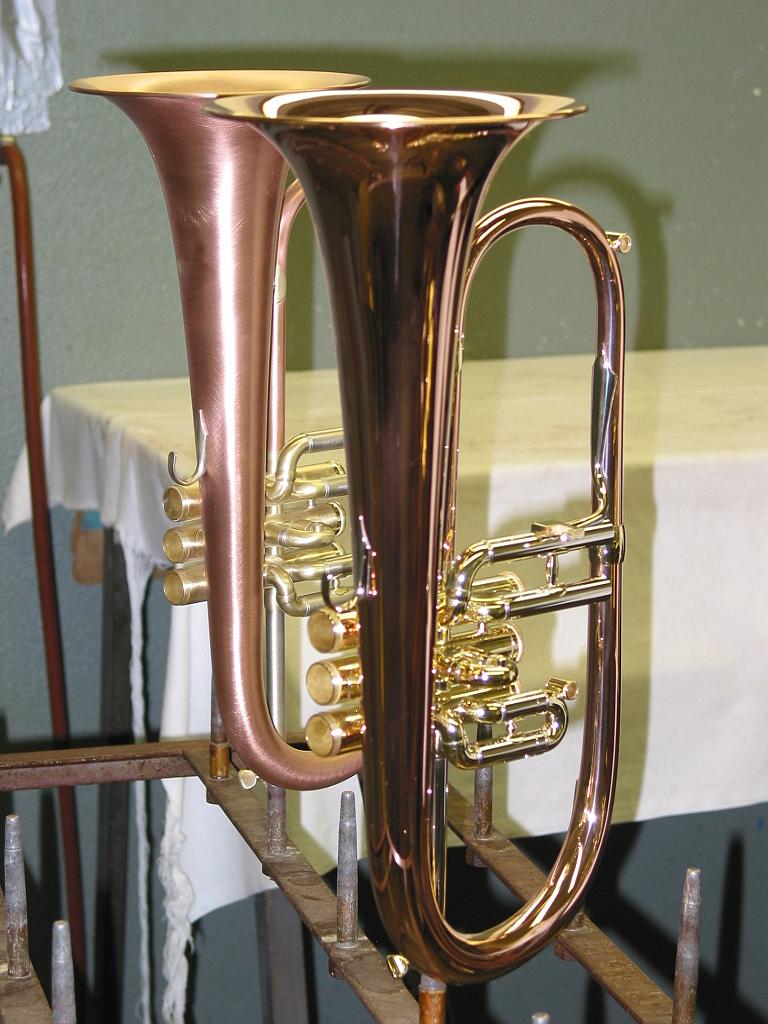
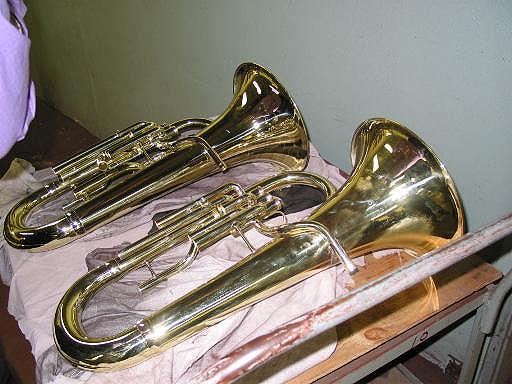
Fluegelhorns, one brushed and one polished.
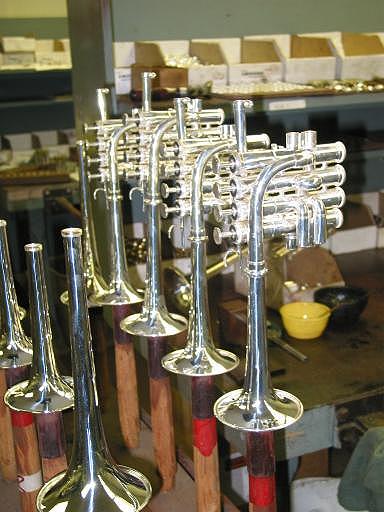
Silver plated piccolos will be fitted with slides.
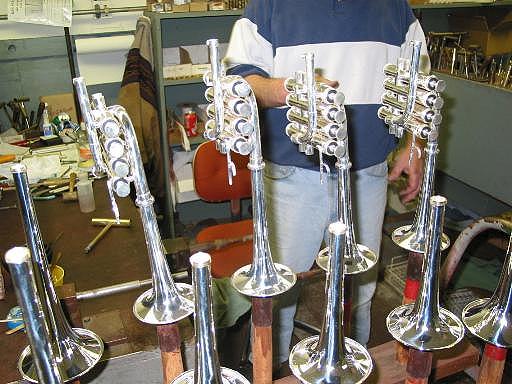
Marching instruments almost ready to march.
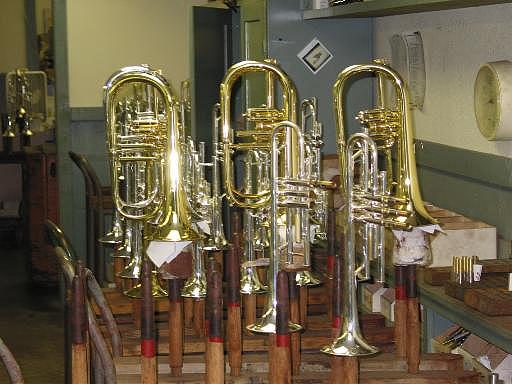
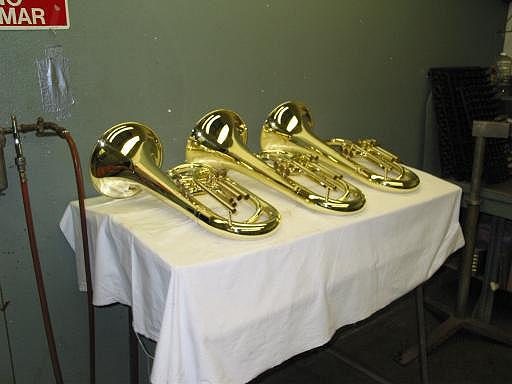
Lacquered euphonious that need slides.
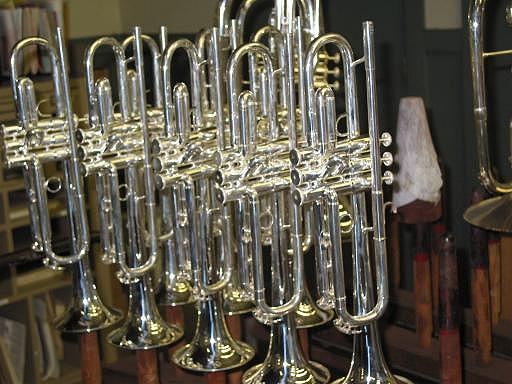
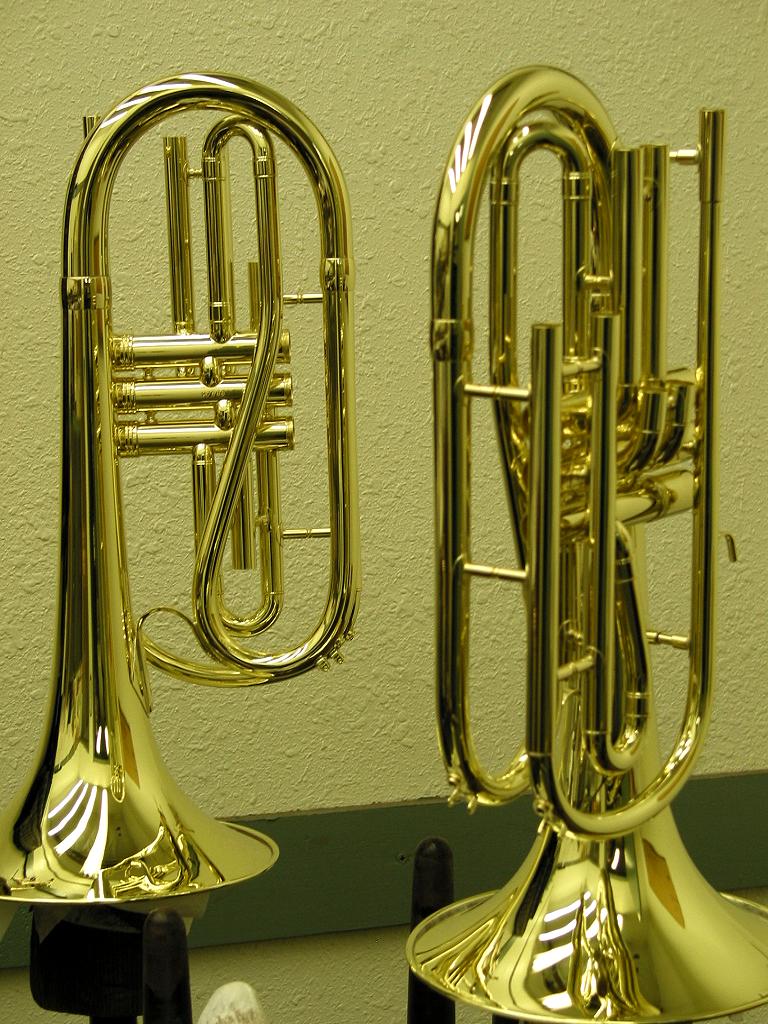
Silver plated trumpets that have been fitted with valves and slides. They
are now ready for inspection and playtesting.
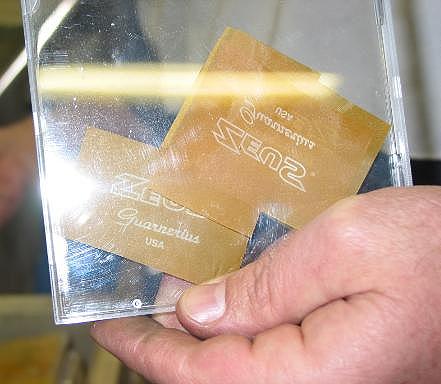
Well you know what this is. Its the template that is used to engrave the famous ZeuS Guarnerius logo.
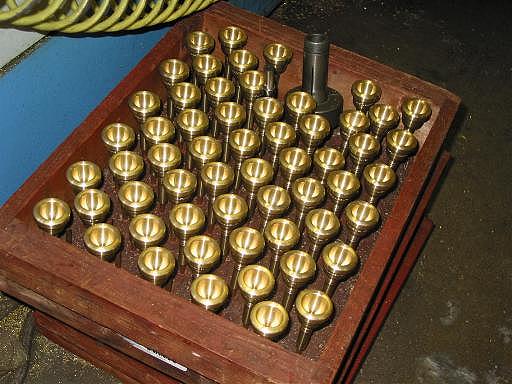
One place where computer precision does come in handy is when making mouthpieces. Mouthpieces are made on this computer controlled machine that is extremely accurate and cuts the same shape consistently every time
Just taken out of the CNC machine pictured above. These mouthpieces are
waiting to be polished and then silver plated.
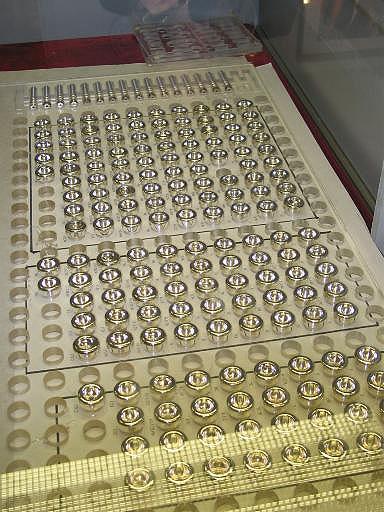
Finished mouthpieces on display. I was told that the factory owns a computerized 3 dimensional scanning machine, worth about a million dollars. This computerized marvel of high technology will absolutely duplicate any shape. The outside and inside of any past or present mouthpiece can be duplicated and recreated with microscopic precision. New mouthpiece designs can also be created to suit any individual player.
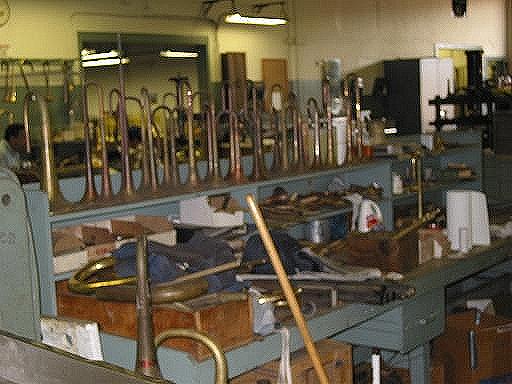
Factory
Floor
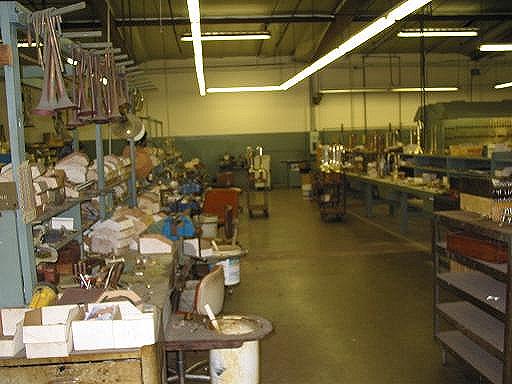
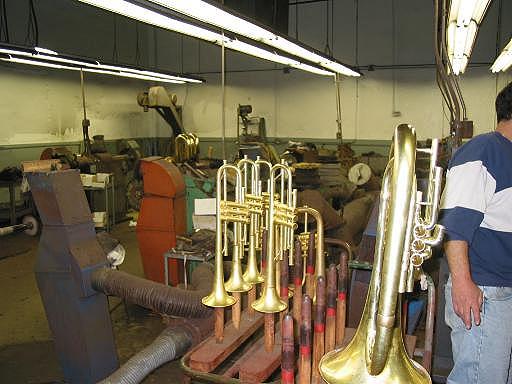
These are not ZeuS trumpets but they wish they were.
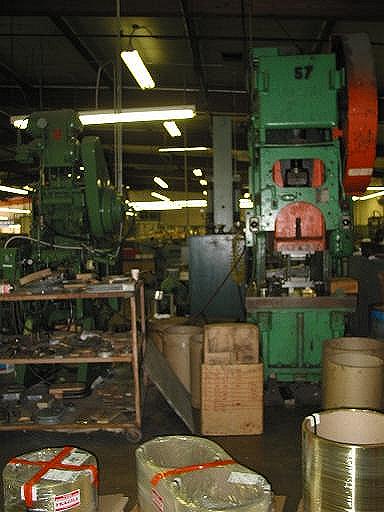
Notice those big green monsters in the back? They are punch presses which come down with several tons of pressure on pieces of brass and form them into parts such as braces that hold the instruments together.
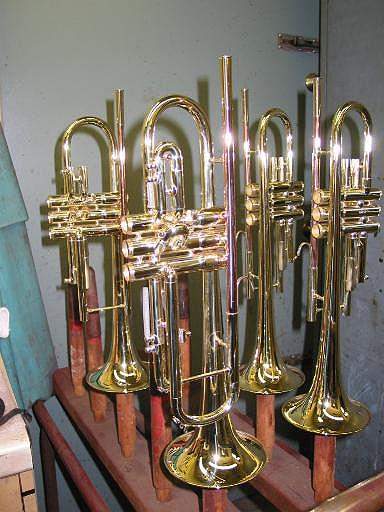
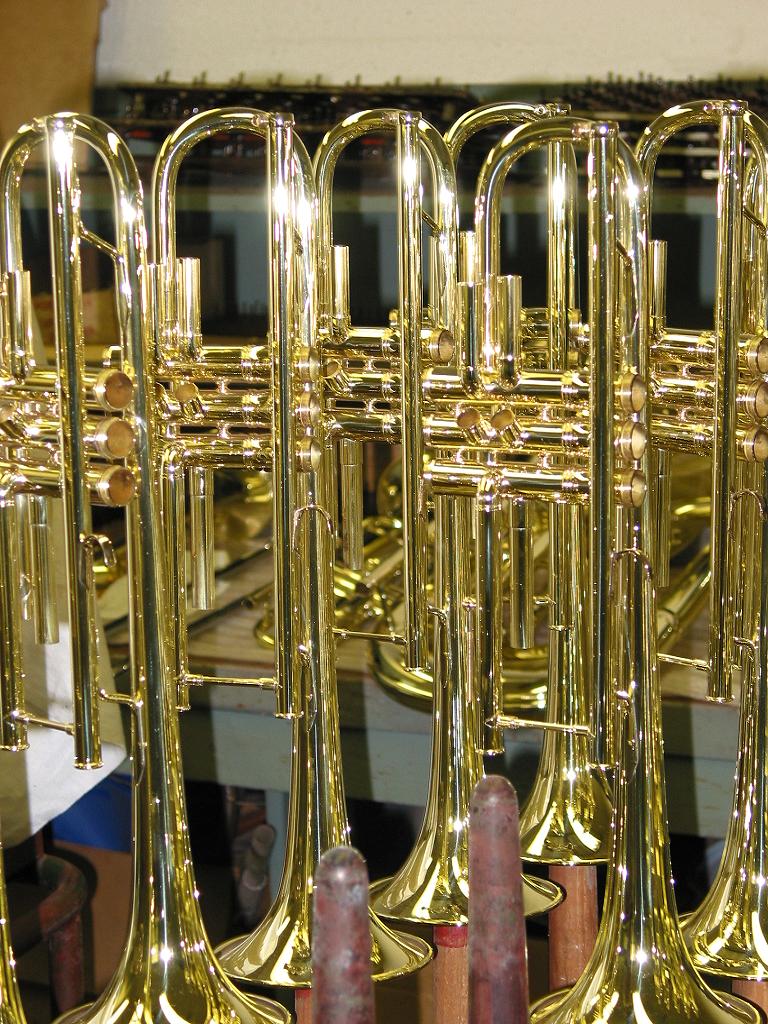
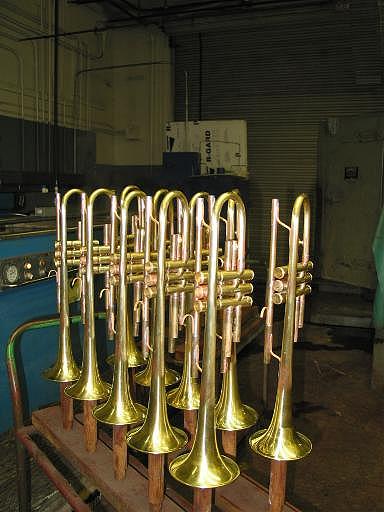
Ten ZeuS Guarnerius trumpets. chances are that if you bought one of these jsut after January 2004, your trumpet is one of these.
You can actually read the serial numbers here. So which one is yours?
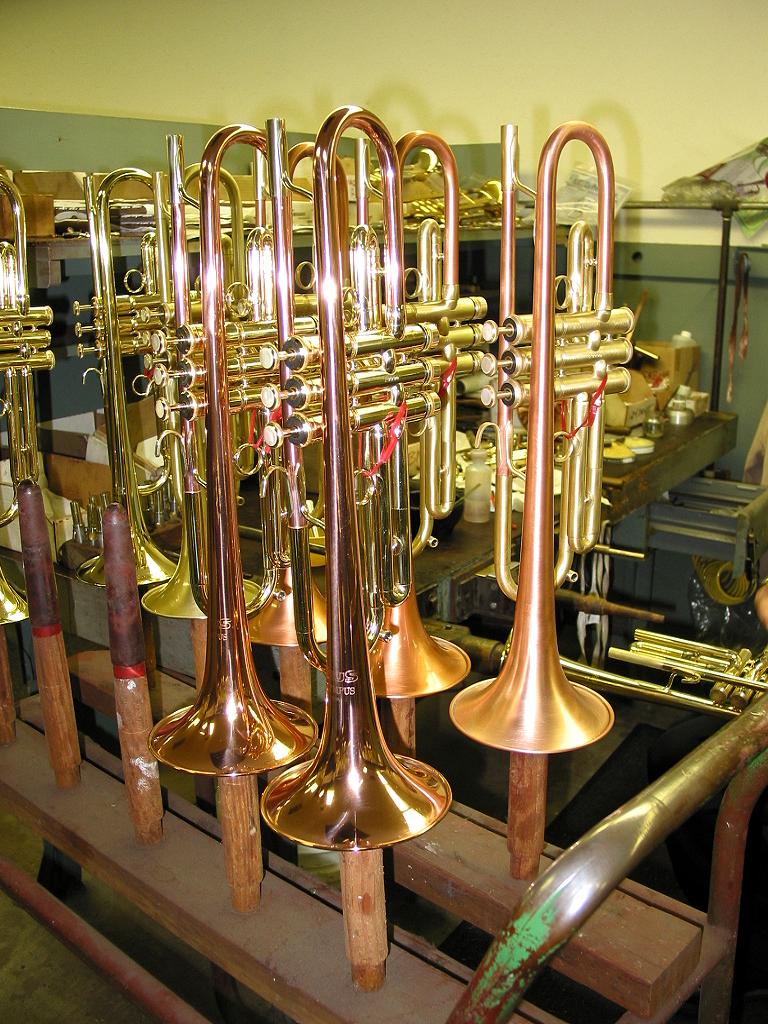
ZeuS Olympus Trumpets almost ready to ship. Very nice job.
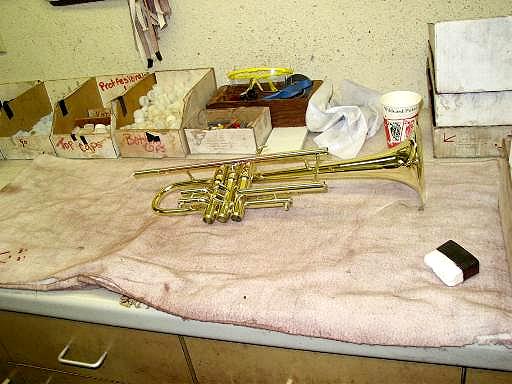
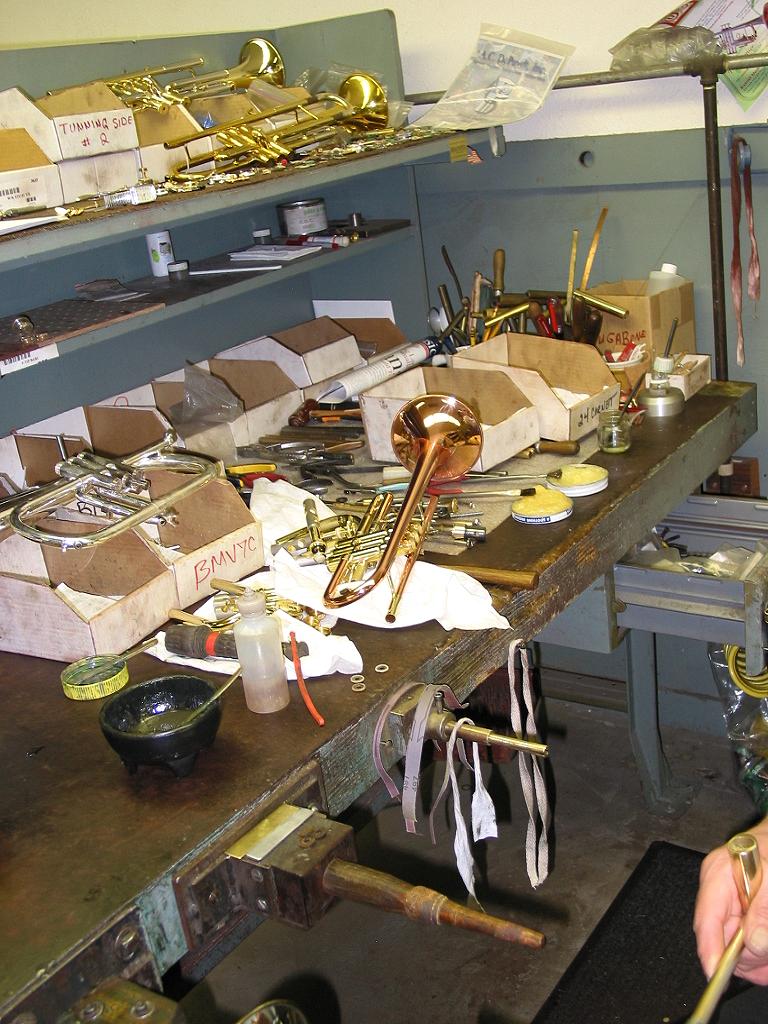
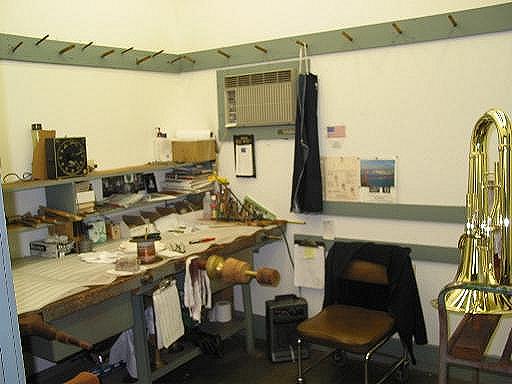
This is the repair area where instruments are rebuilt to play like new again after thirty years.
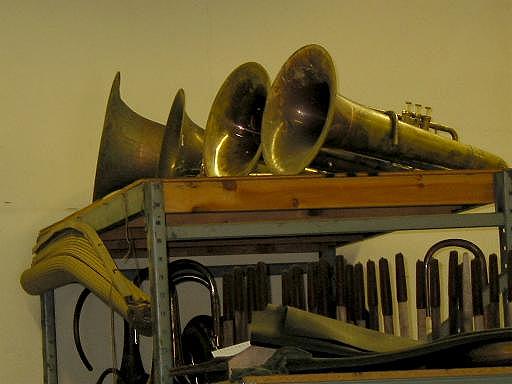
Some tubas awaiting reconditioning.
This is the Styrofoam peanut bag used in the packing of all Guarnerius trumpets before shipping. Very important indeed.
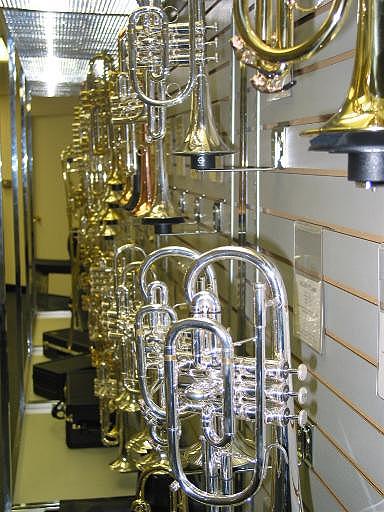
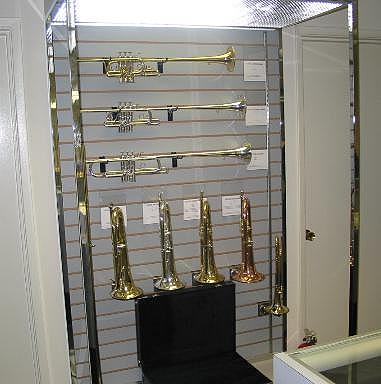
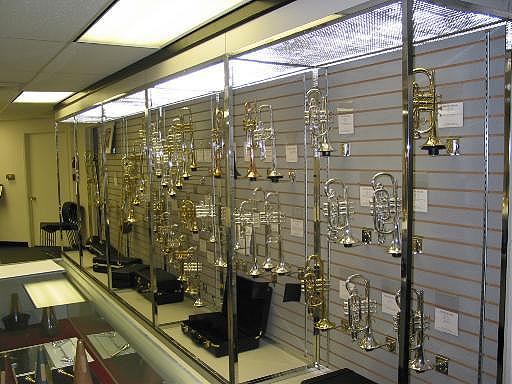
The factory has a showroom where they display the various instruments they make.
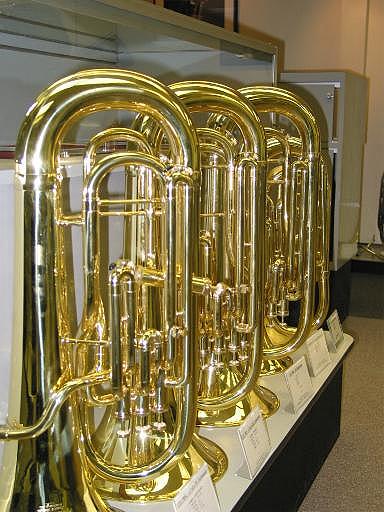
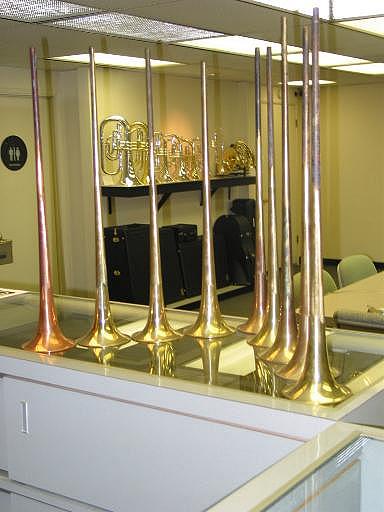
They also have a little instrument museum with some odd and antique instruments.
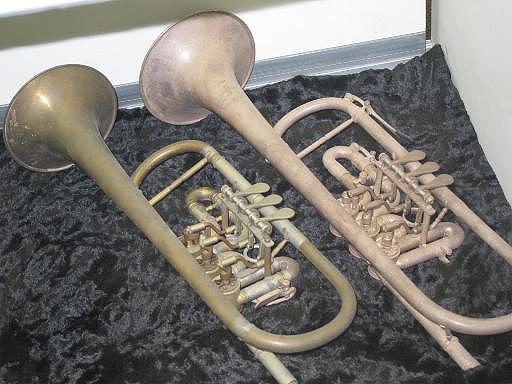
These are antique rotary valve trumpets. This is what all trumpets looked like before the American piston valve trumpet was invented. Rotary valve trumpets are still used in the best symphonies around the world. In fact if you show up with a piston valve trumpet in the Vienna symphonies or other European symphonies, you will be run out of town. They call piston valve trumpets "Jazz trumpets" or "American trumpets". Interesting, isn't it?